Salesforce ODBC Driver for JMP Connection

Accessing the Salesforce database can be fast and seamless by using the Open Database Connectivity (ODBC) solution. Providing full interoperability, the ODBC driver for Salesforce allows you to access live Salesforce data directly from JMP. It enables you to retrieve data to JMP, and review and modify these data right in this application.

Salesforce Key Features

  • Customization and flexibility
  • Forecasting and analytics
  • Files sync and share
  • Sales automation

JMP Key Features

  • Advanced statistical modeling
  • Basic data analysis and modeling
  • Data access capabilities
  • Data exploration and visualization
Native Connectivity to Salesforce

Direct Connection

Our data connector enables various ODBC-aware applications to establish a direct connection to Salesforce via TCP/IP to eliminate the need for a Salesforce client. A direct connection increases the speed of data transmission between JMP and Salesforce for real-time analytics. It streamlines the deployment process since there is no need to distribute any additional client-side software with the ODBC driver for Salesforce.

What are some reasons to choose Devart ODBC Driver for Salesforce?

Integration

Integration

ODBC Driver for Salesforce is compatible with JMP allowing extraction of data by executing SQL statements.

Platforms Variety

Platforms Variety

ODBC Driver for Salesforce can be used with 32-bit and 64-bit applications on both x32 and x64 platforms, so there is no need to additionally configure the driver, applications, or environment.

Fully Unicode-Compliant Driver

Fully Unicode-Compliant Driver

With our fully Unicode-compliant driver, you can properly retrieve and modify any data in multilingual Salesforce databases, regardless of their character set: Latin, Cyrillic, Hebrew, Chinese, etc., and in any language environment.

How to download, install, and configure ODBC Driver for Salesforce?

Download the driver. Run the installer and follow the instructions in the wizard. Open ODBC Data Sources. In the System DSN tab, click Add. Select the needed driver and click Finish.
In the License tab of the Configuration dialog, click Input Activation Key and enter your key. Click OK.
In the General tab of the Configuration dialog, fill in the fields with the database connection data. To test the connectivity, click Test Connection. To save the DSN, click OK.
Tools

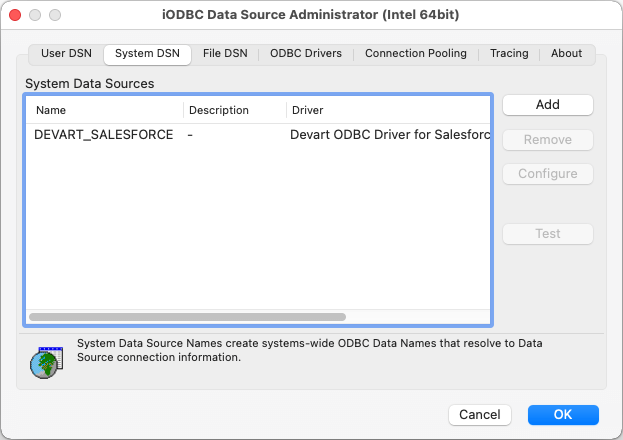
To install and configure ODBC Driver for Salesforce on macOS, download first the PKG file from the Devart website. Run the downloaded file and follow the instructions in the wizard. After installing the driver, run the 64-bit or 86-bit iODBC utility, find the needed driver, and click Configure. In the dialog box that appears, specify the required connection settings and click OK. To establish a connection to the data source, click Test.

macos
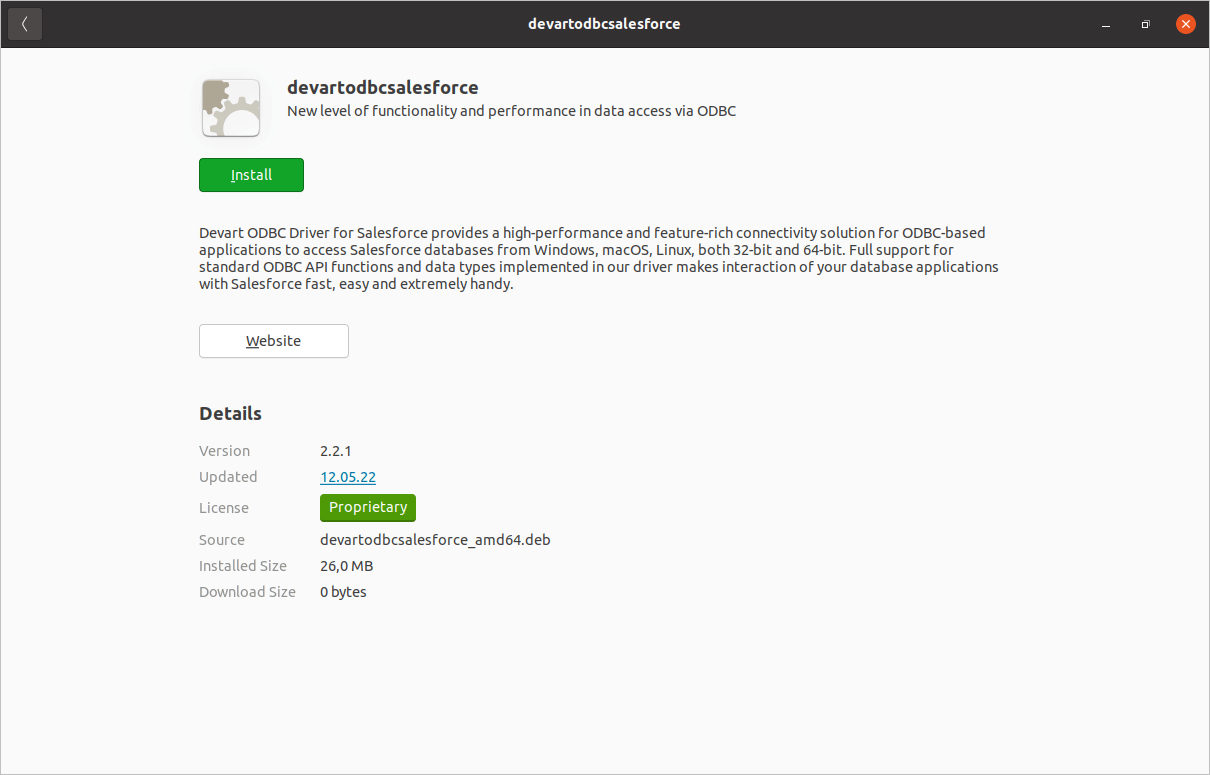
Installation of an ODBC driver on Ubuntu is carried out from the DEB package. Download the package that matches the bitness of your operating system.
Then open the folder with the downloaded package, double-click the DEB package, and click Install.
Open the Terminal and install the driver by using the following command.
If you use CentOC, you need to download the RPM package of the corresponding bitness.
After that, open the Konsole and navigate to the folder with the downloaded package specifying the path to the folder as a parameter of the cd command. Then, install the driver by using the following commands.
Gui installation

To install the devartodbcsalesforce_i386.deb on a 32-bit system, use:

use sudo dpkg -i devartodbcsalesforce_i386.deb

To install the devartodbcsalesforce_amd64.deb on a 64-bit system, use:

sudo dpkg -i devartodbcsalesforce_amd64.deb

For more detailed information about installing and configuring ODBC Driver for Salesforce on Ubuntu, go to the documentation.

cd ~/Downloads/

To install the devart-odbc-salesforce.i386.rpm on a 32-bit system, use:

sudo -rpm -ivh devart-odbc-salesforce.i386.rpm

To install the devart-odbc-salesforce.x86_64.rpm on a 64-bit system, use:

sudo rpm -ivh devart-odbc-salesforce.x86_64.rpm

For more detailed information about installing and configuring ODBC Driver for Salesforce on Centos, go to the documentation.

How to connect JMP to Salesforce data source and access data in 3 steps

Install the driver and configure an ODBC data source in the driver settings

01. Install the ODBC Driver. In JMP, go to File > Database > Data Connectors > New Connection. Select the ODBC Driver from the list and Connect.

Install the ODBC driver for JMP
Start SQL Server Management Studio and create a linked server

02. Select the necessary schema and table from that schema. Click Open Table to load all data or Query Builder to load a part of that data.

Select Database Source in JMP
Run a query against the data storage

03. The data will be loaded into the JMP interface directly. You can work with it using the tools to analyze and visualize the information.

Retrieve data from linked database into JMP

Advantages of Connectivity to Salesforce from JMP via ODBC Driver

Secure Connection

Secure Connection

Every operation with Salesforce becomes significantly faster using such capabilities of our driver as local data caching, connection pooling, and much more.

Working with JMP using Multiple Functions

Working with JMP using Multiple Functions

Using JMP, you can create tables, add data, select, delete, sort, edit, combine data from several database tables, and find unique values quickly and easily.

ODBC Conformance

ODBC Conformance

The driver fully supports the ODBC interface, its data types, and functions. It offers advanced connection string parameters and allows any ODBC-compliant desktop or web application to connect to Salesforce from JMP on various platforms.

Simple SQL Querying on JMP Files

Simple SQL Querying on JMP Files

JMP processes SQL through its SQL dialect. Using ODBC connection, it is simple to execute different SQL queries to retrieve entire tables or specific columns from Excel, filter data, formate data, numbers, etc.

Cost-Effective Deployment

Cost-Effective Deployment

Installing the driver is easy with the standalone installation file. There is no need in deploying and configuring any additional software which results in a reduction in deployment costs.

Sharing Your Data with Excel

Sharing Your Data with JMP

You can share your data with other users in JMP quickly and easily. Upload your JMP data to the SharePoint lists so that it can be available for you and others to use to create reports, data models, dashboards, etc.

Popular JMP Integrations Using ODBC Driver