Version-controlling
SQL Server Databases
in GitHub
This article is dedicated to the aspects of version-controlling SQL Server databases in GitHub with dbForge Source Control.
The described workflow of source-controlling databases applies to all version control systems supported by dbForge Source Control.
The choice of GitHub for this article is motivated by the ever-growing popularity of cloud-based version control systems. With Source Control, you can easily:
-
commit and revert changes
-
view and resolve conflicts
-
track changes
- link static data
Create and clone a GitHub repository
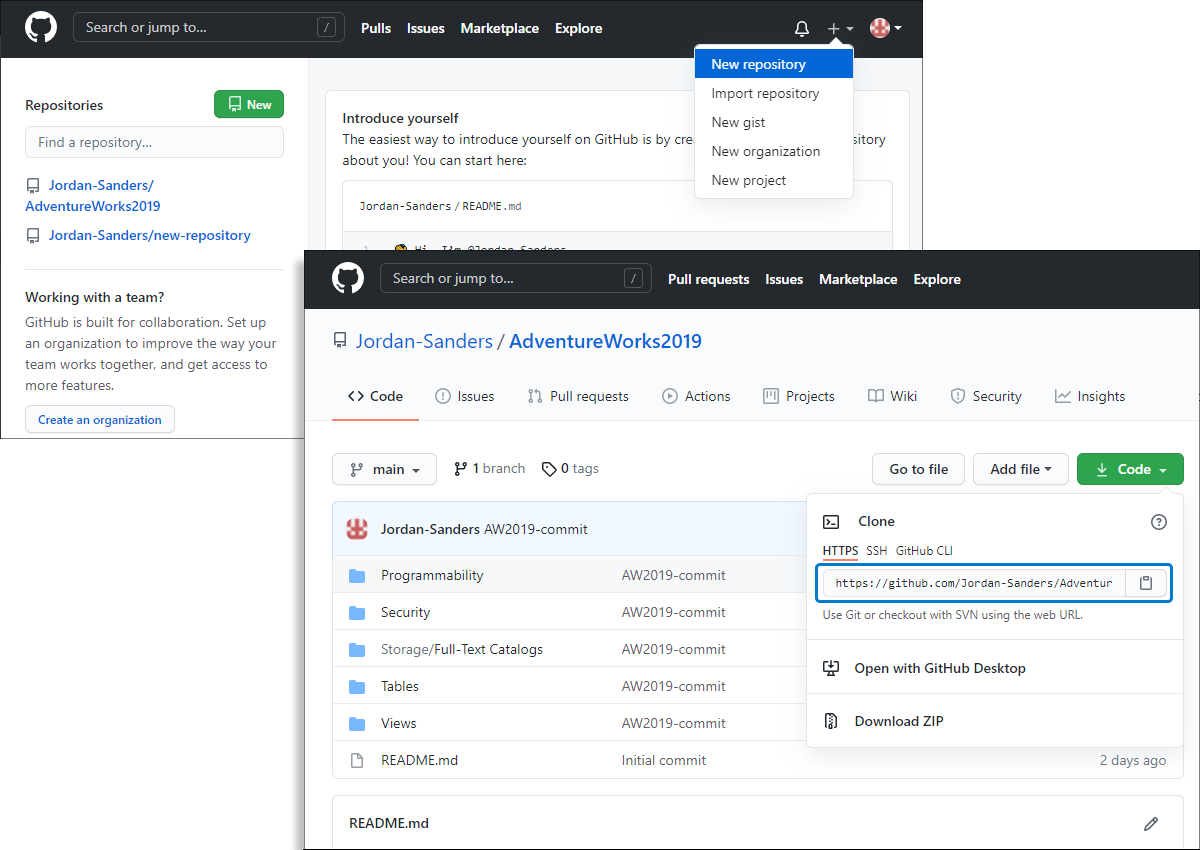
On GitHub, you can create and clone repositories
to restore and share different projects. To create a new repository on GitHub, you need to have a GitHub account.
On the GitHub account page, click the + dropdown menu to create a repository, enter the repository name and optional description,
select the visibility options, and set ignore rules, if needed.
Then, you can clone the repository from GitHub to your computer to resolve conflicts,
make commits, and manage files easily and quickly. In the command prompt, add the location of the cloned repository, type git clone,
paste the repo URL copied from the GitHub account, and run the command.
Link a database to Source Control
The first step you should take after downloading and installing dbForge Source Control is to link a database to a remote GitHub repository.
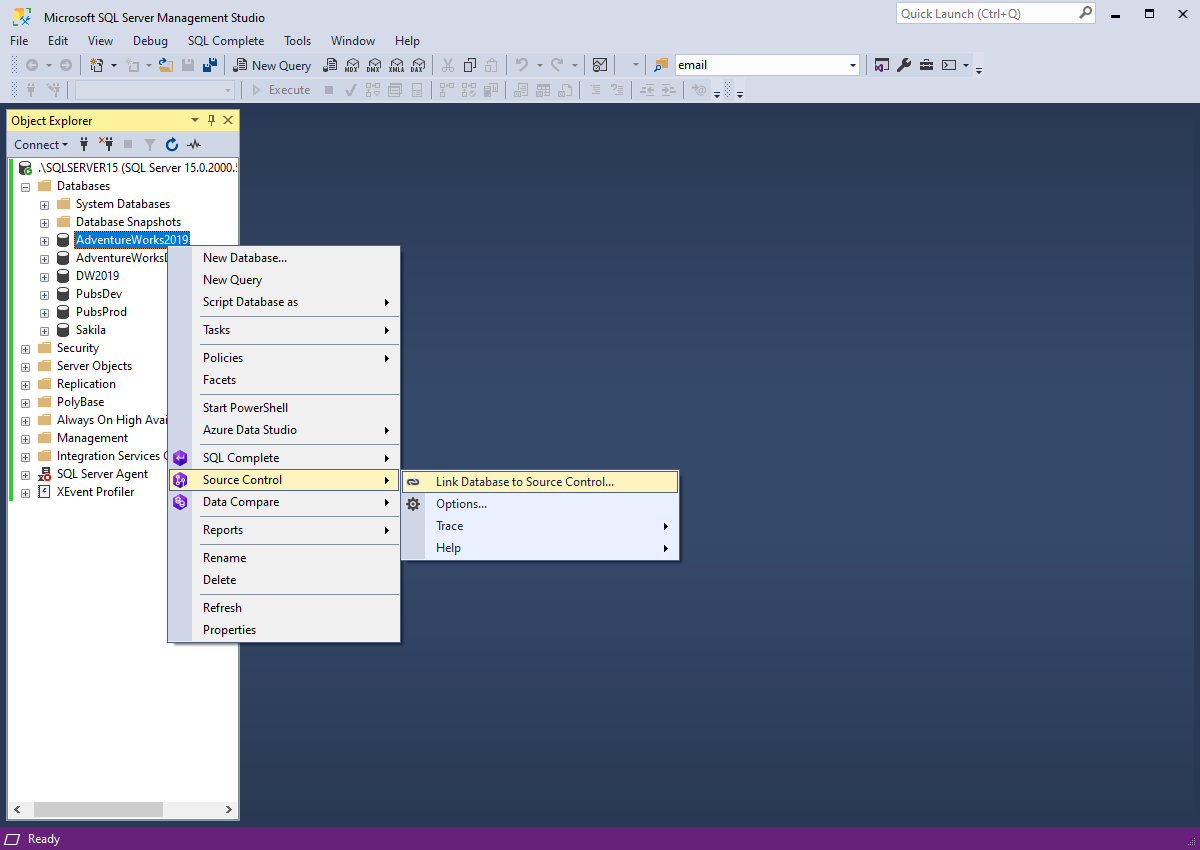
For this, right-click a database in Object Explorer, click Source Control, and then select Link Database to Source Control.
dbForge Source Control supports Git for Windows client so that you can work with all possible connection and authentication types, as this task is delegated to the Git client.
To link your database to a Git repository, you need to only specify a folder or a sub-folder in a local Git repository where dbForge Source Control for SQL Server will store SQL scripts.
Select Git source control repository
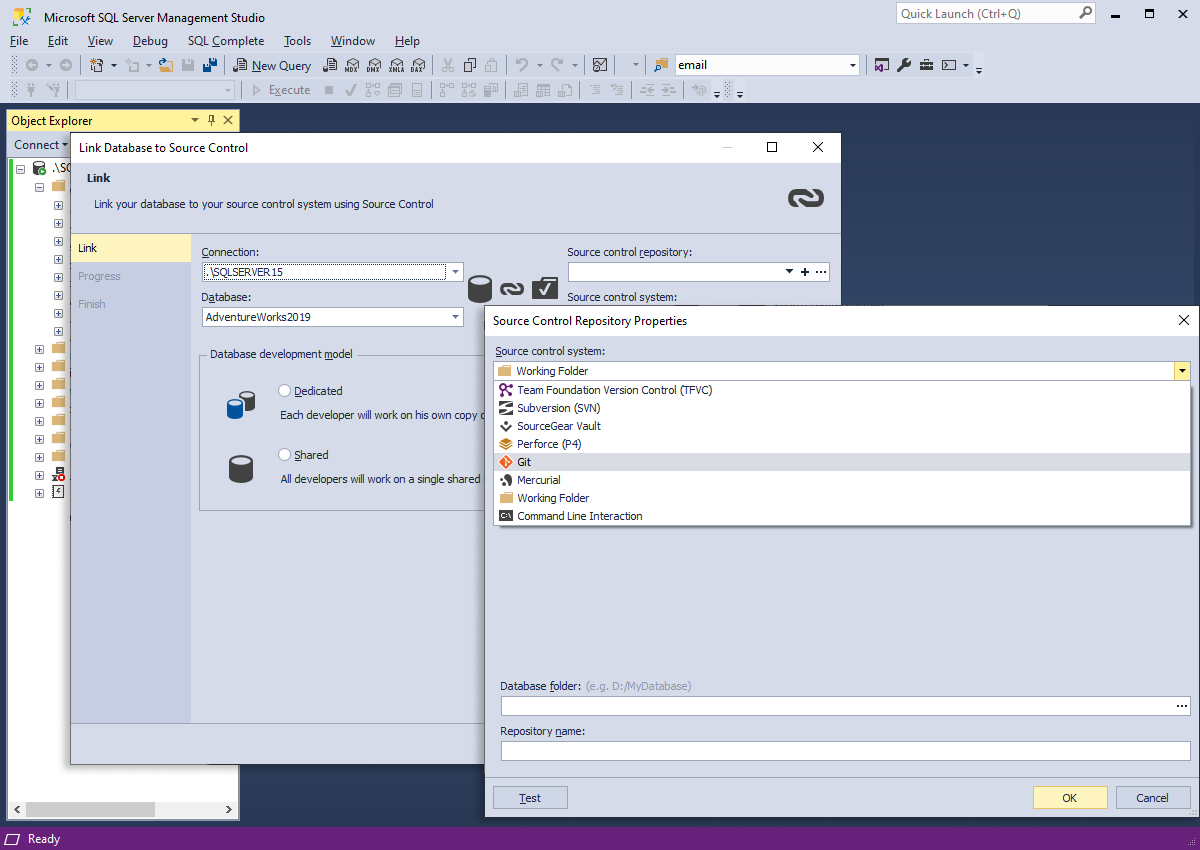
In the Link Database to Source Control wizard that opens, specify a connection and a database
you want to connect to the source control system. In the Source Control repository field, click Manage
to open Source Control Repository Properties window.
Next, select Git as a Source Control system and provide a path to the repository folder on your computer, which is a clone of your remote GitHub repository.
Finally, select a database development mode and click Link. We select the Dedicated model, where each developer works with his own copy of the database.
Make an initial commit
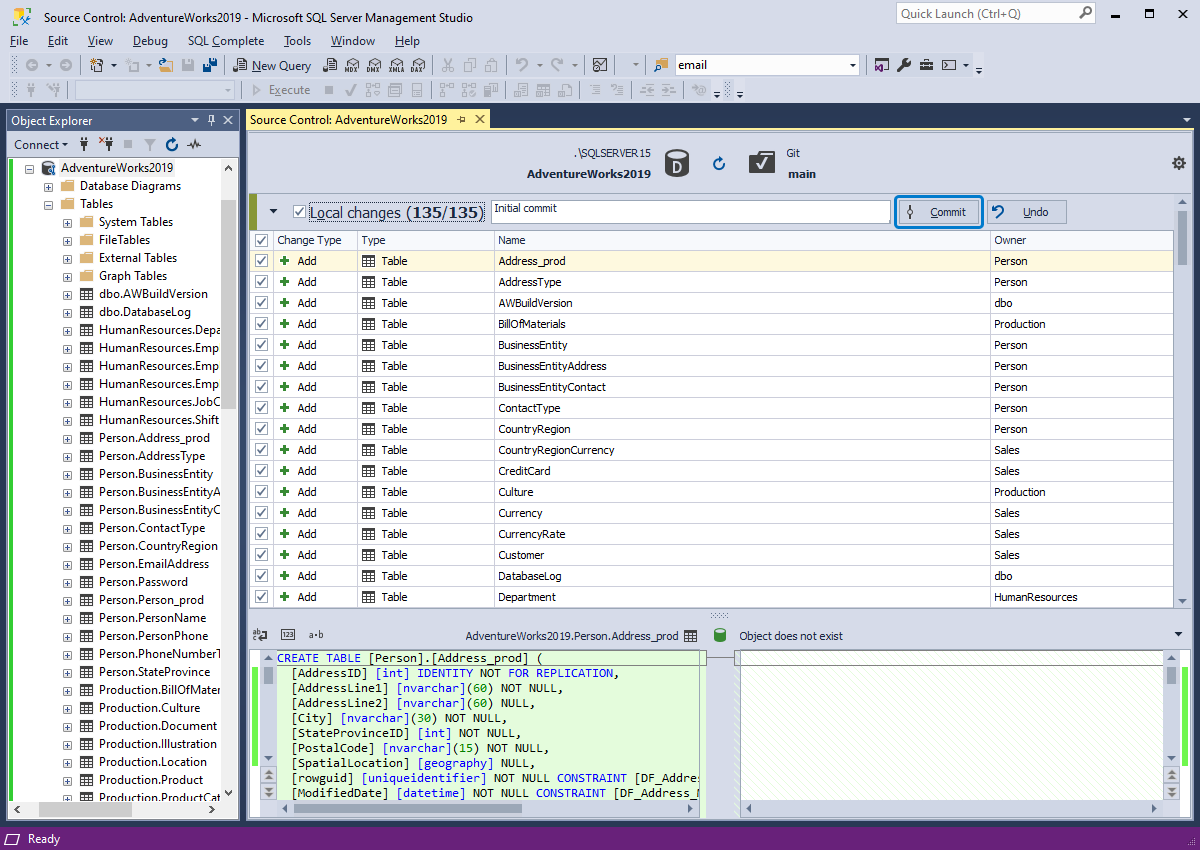
You'll see the following Source Control Document window after successful database linking. Since currently our remote repository
is empty, we need to commit our database files to it. To do this, we just need to select all files in the Local Changes section of the document, write a comment, and click Commit.
When the commit is over, the document will show that there are no changes in database objects, which means that our local database files and the ones at GitHub are absolutely identical.
Basically, all changes you make in your local database will be represented on the Local Changes tab. If you do not want to commit certain changes, click Undo, and all your local changes will be reverted.
How to associate commits with GitHub issues
With dbForge Source Control, you can easily associate your commits of local changes with GitHub Issues as well as close GitHub Issues right from dbForge Source Control.
With dbForge Studio, you can link your commits to GitHub issues and close GitHub issues with your commits.
To link a commit to a GitHub Issue, put the issue number with the # character in the Comment text box. For example, #111.
To close a GitHub issue, put a keyword and put the issue number with the # character in the Comment text box. For example, Close #111.
Keywords to close a GitHub Issue
To close a GitHub issue, you can use any of the following keywords:
- Close
- Closes
- Closed
- Fix
- Fixes
- Fixed
- Resolve
- Resolves
- Resolved
Example
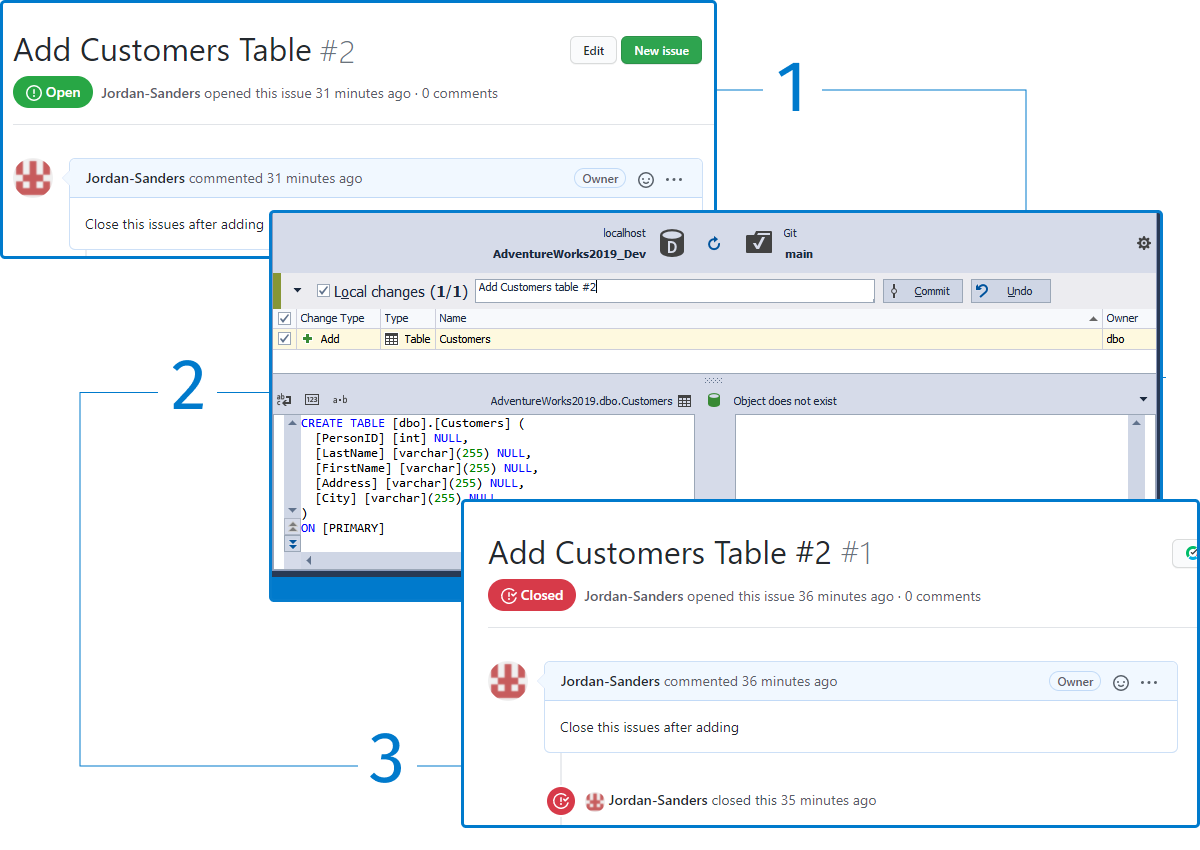
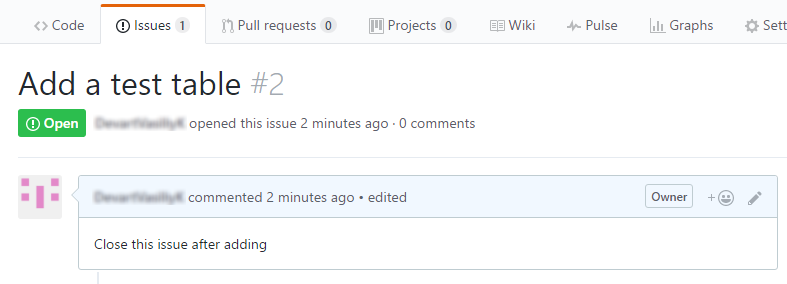
Suppose, we have an open issue #2 with request to create a test table and close the issue afterwards.
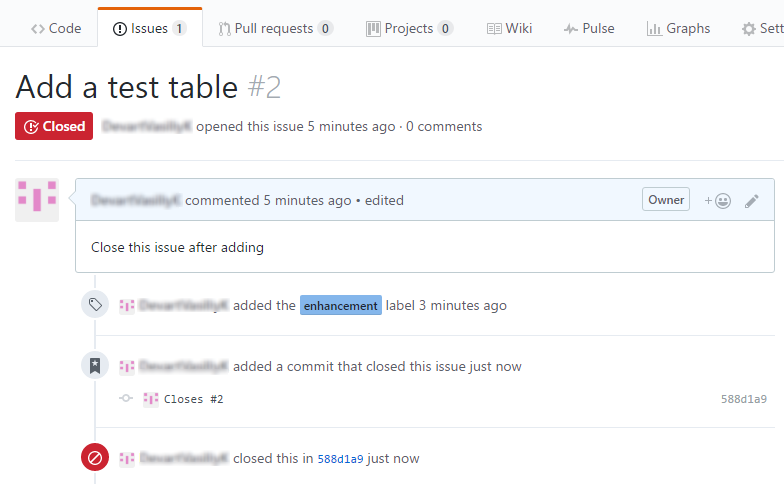
When the table is created, we need to open Source Control Manager and put Closes #2 before committing the created table.
As a result, issue #2 has been successfully closed.
Get remote changes
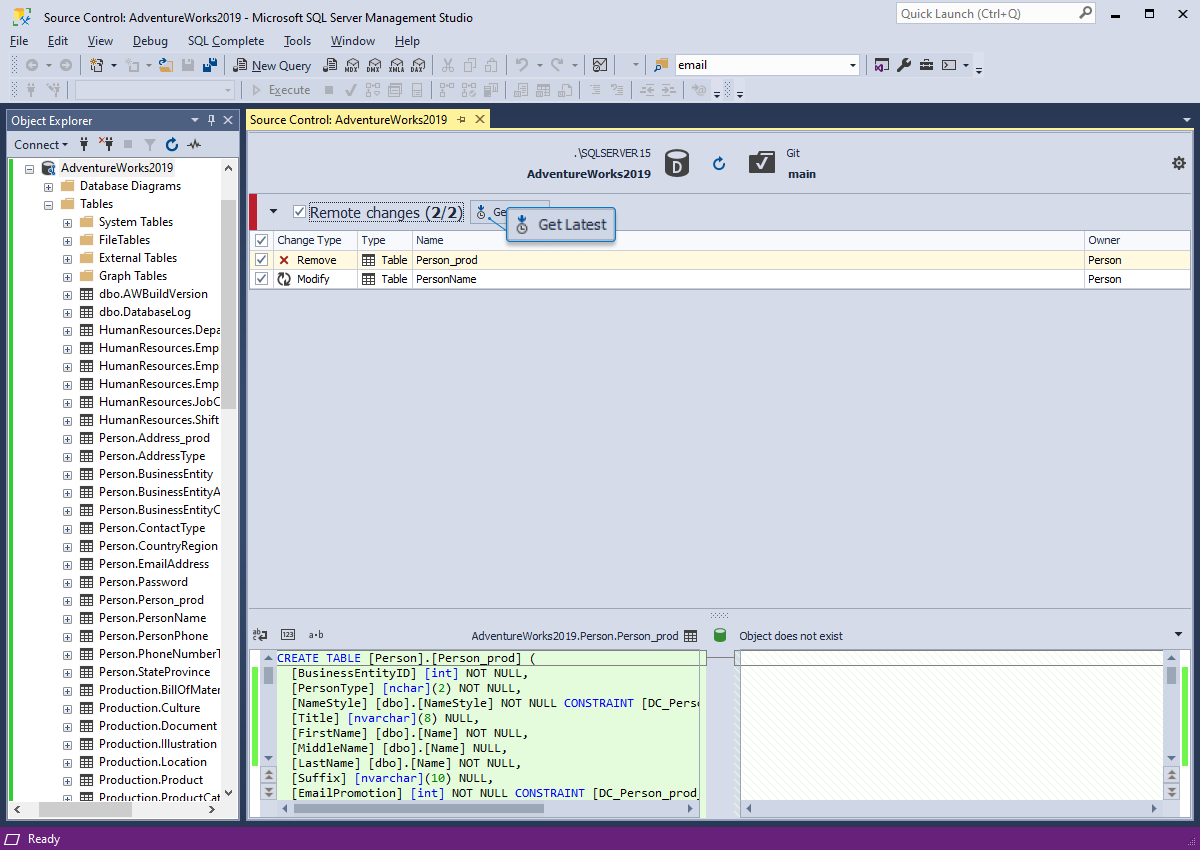
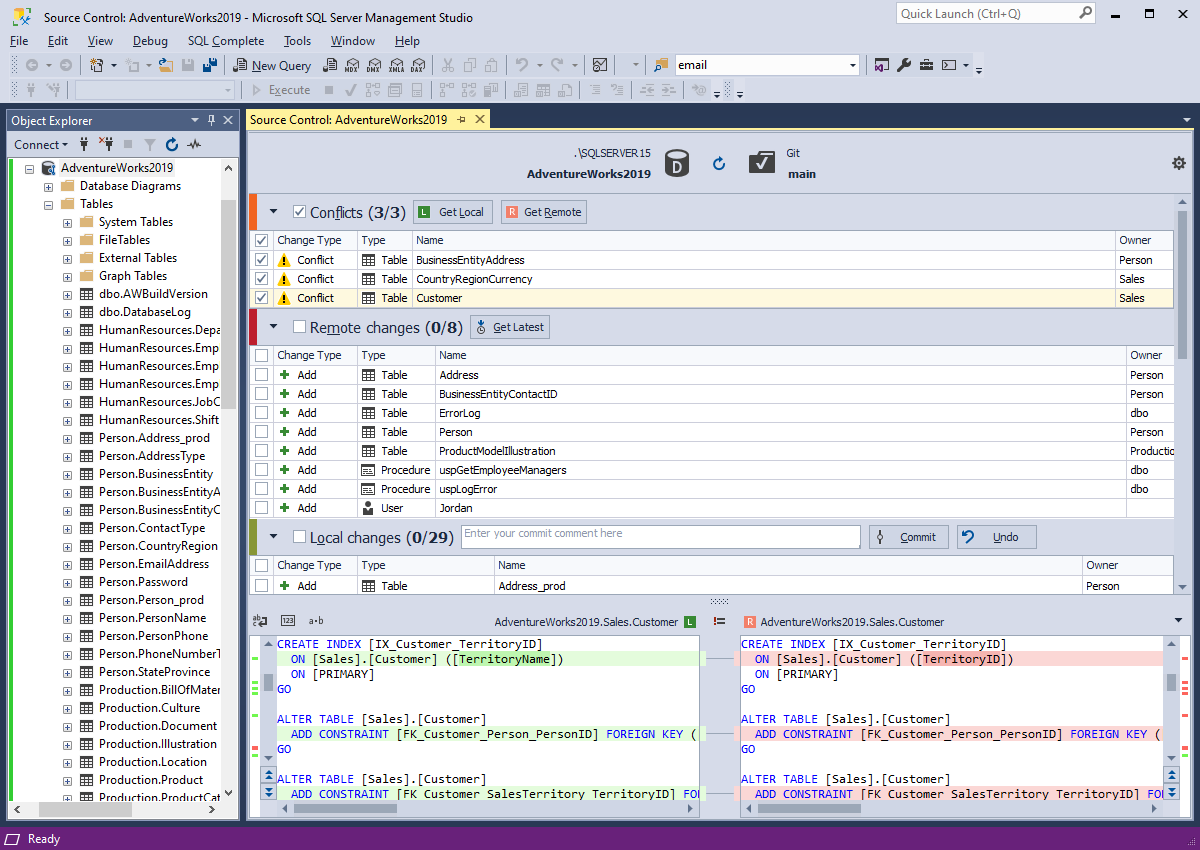
When other developers modify database files and commit their changes to the repository, these changes are represented in the Remote Changes section of the Source Control Document.
All you need to do for updating your local database is to select changes and click Get Latest.
In the lower part of the Source Control Document window, you can see SQL scripts for database objects.
Resolve conflicts
Conflicts happen when you and other developers modify the same database object or its property.
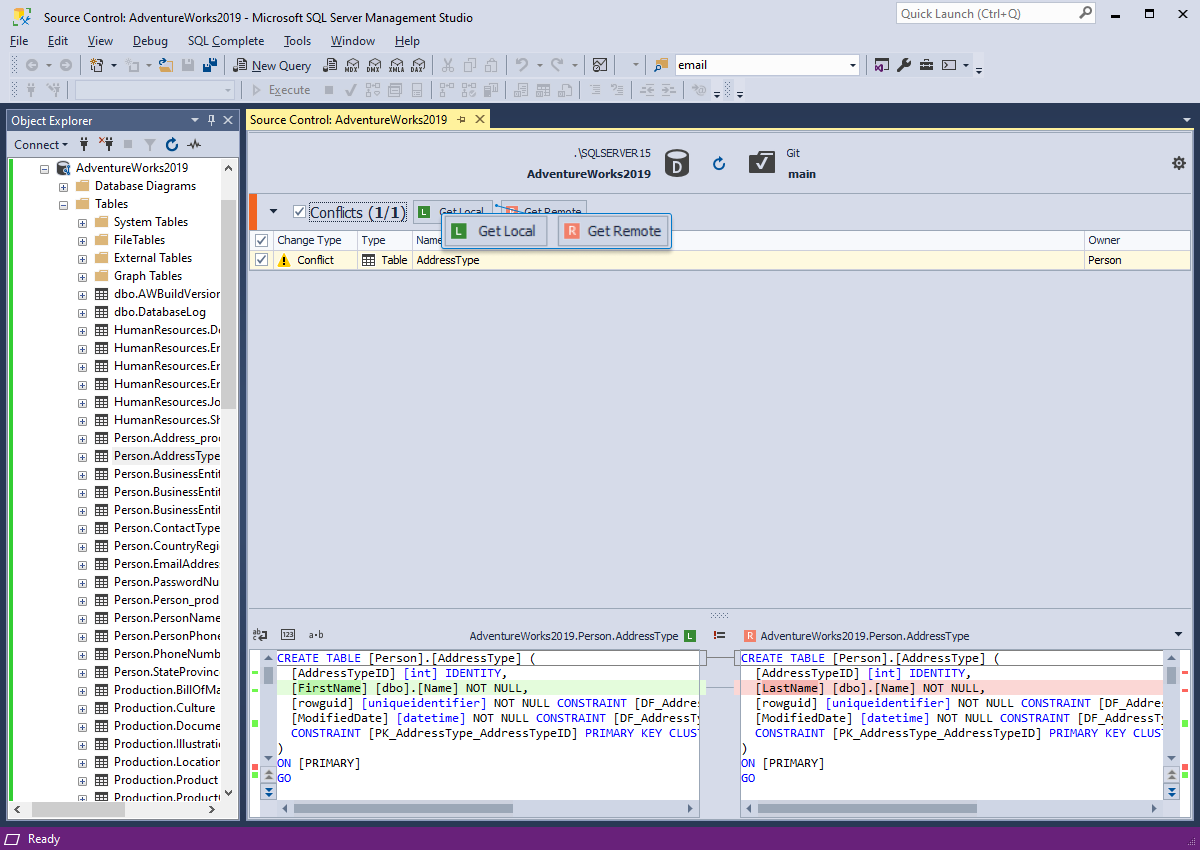
In dbForge Source Control, conflicts are displayed in the Conflicts section of the Source Control Document. To resolve a conflict, select it in the Conflicts
list and click Get Local to override remote changes with your local ones, or Get Remote if you want to override your local changes with the remote ones.
The Source Control Document also shows DDL diffs for the conflicts, so you will instantly know the reason for the conflict.
Work with multiple branches
dbForge Source Control allows using multiple branches simultaneously that drastically simplifies the database development
and helps fix various issues separately, test them locally, and then merge them to the main branch.
With the tool, users can easily connect a database to a specific repository of version control systems supported by the tool and switch between branches.
After the database is linked to the repository, users can get the latest changes from the remote repository to the local copy,
commit, merge, or revert the changes to/from the current branch, resolve conflicts, and view the change history.
