How to export data from Oracle to Excel
Who wouldn't like their routine data migration quick, simple, and exceptionally flexible? Well, that's exactly what dbForge Studio for Oracle delivers. With its help, it's easy to set up direct, wizard-aided import and export with 14 different formats at your service. Moreover, you can use highly customizable templates and the command line to automate recurring operations in just a few clicks.
The import and export-related capabilities of dbForge Studio include the following:
- 14 data formats for import and export: HTML, TXT, XLS, XLSX, MDB, RTF, PDF, JSON, XML, CSV, ODBC, DBF, SQL, and Google Sheets
- Smart wizards with extensive settings, tailored to each format
- User templates that help save time on regular import and export tasks
- Automation from the command line
Let us show you how it's done by exporting data from an Oracle database to a Microsoft Excel file (XLS, to be precise).
Export Oracle table data to Excel
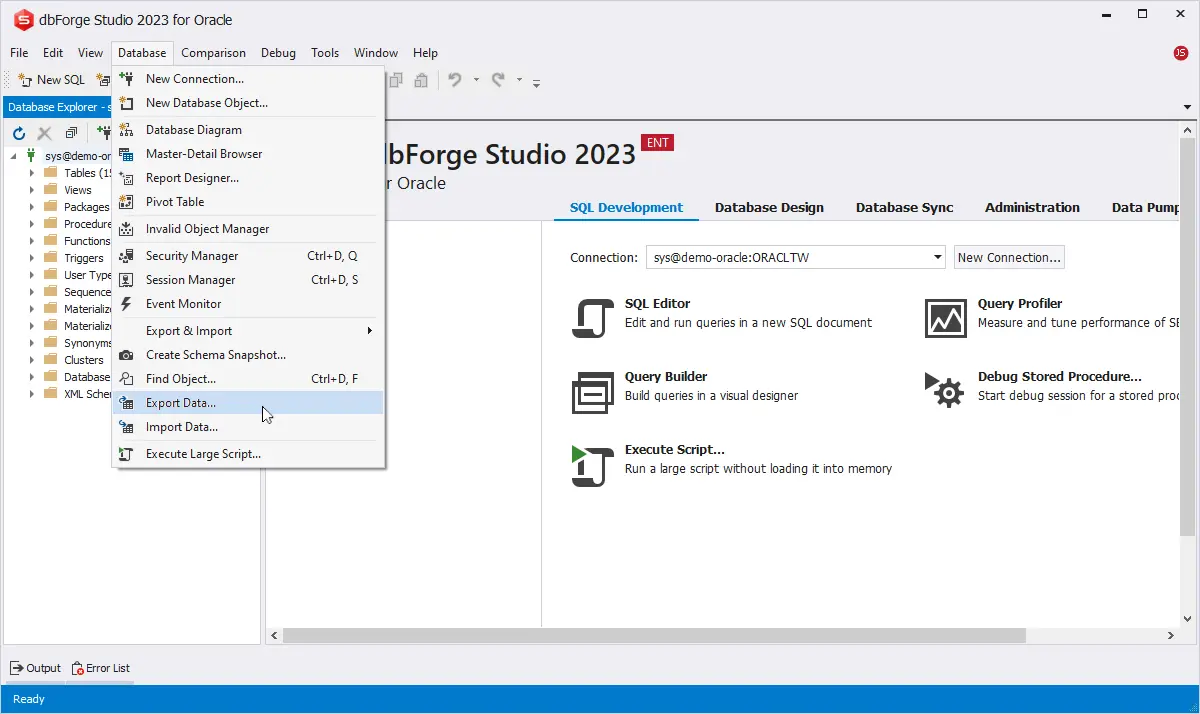
1. Your first step is to open the Studio and connect to the database that contains the data that needs to be exported. After that, go to Database Explorer. Find the required table, right-click it, and select Export Data.
Alternatively, you can select Export Data from the Database menu.
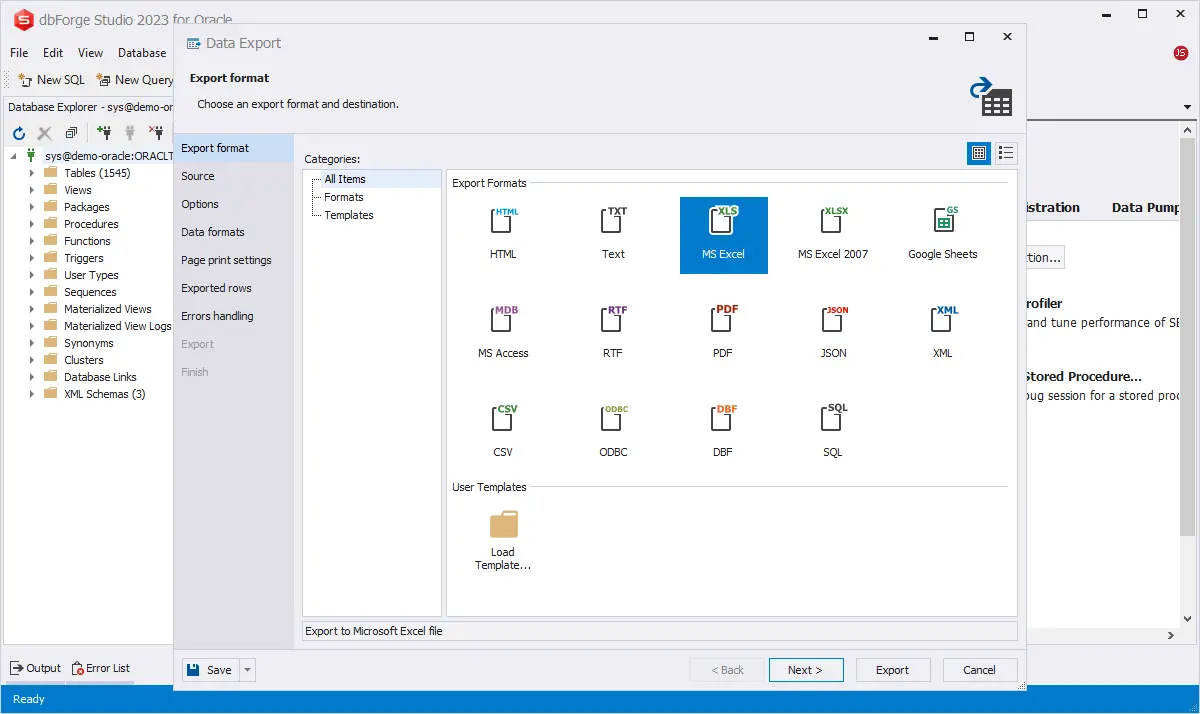
2. The Data Export wizard opens. On its first page, Export format, select a required export format and click Next.
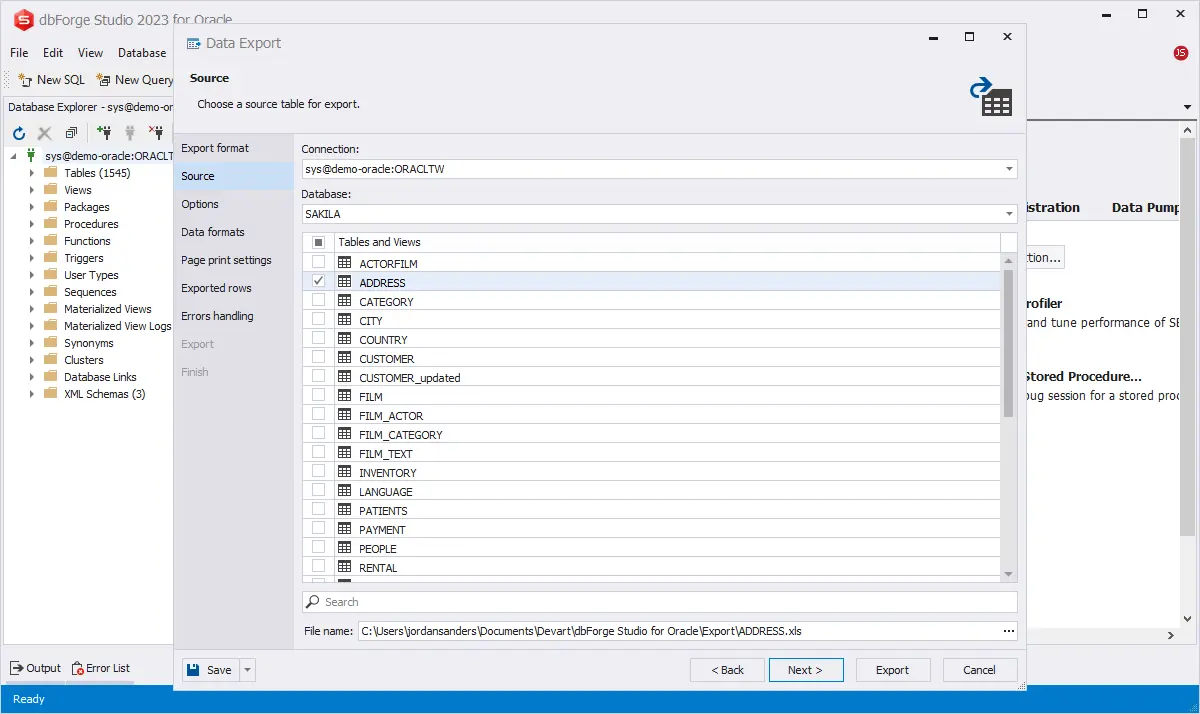
3. On the Source page, select a server connection, a database and its schema, table(s) and view(s) that you want to export, and click Next.
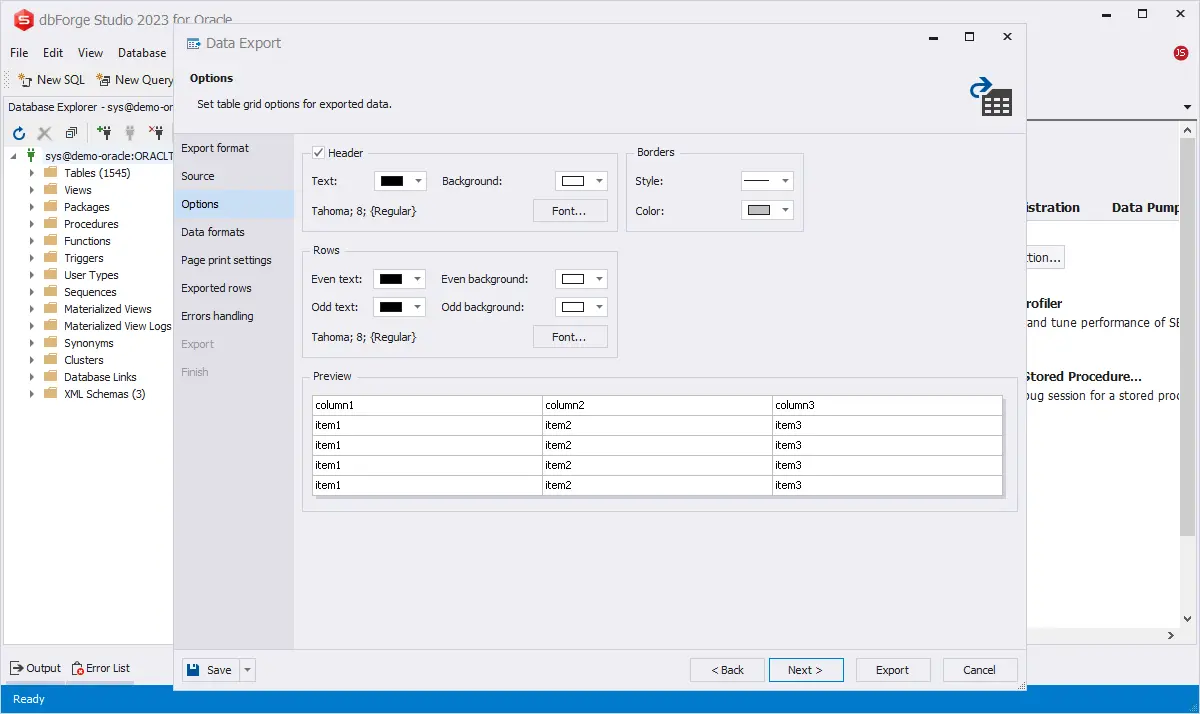
4. On the Options page, configure the table grid options for exported data: text and background colors and fonts in Header and Rows, as well as the width and color of Borders. The results of your configuration are shown in Preview. Once done, click Next.
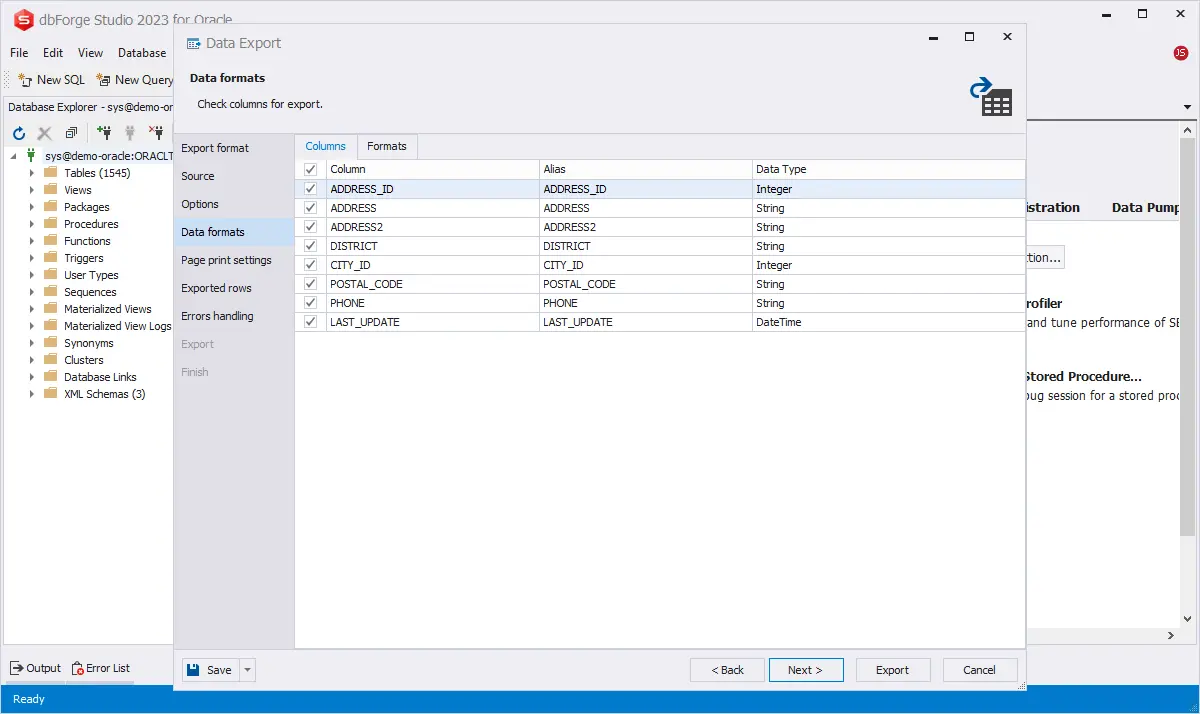
5. On the Data formats page, you have two auxiliary tabs. The first one is called Columns. There, you can select columns for export and check their aliases and data types.
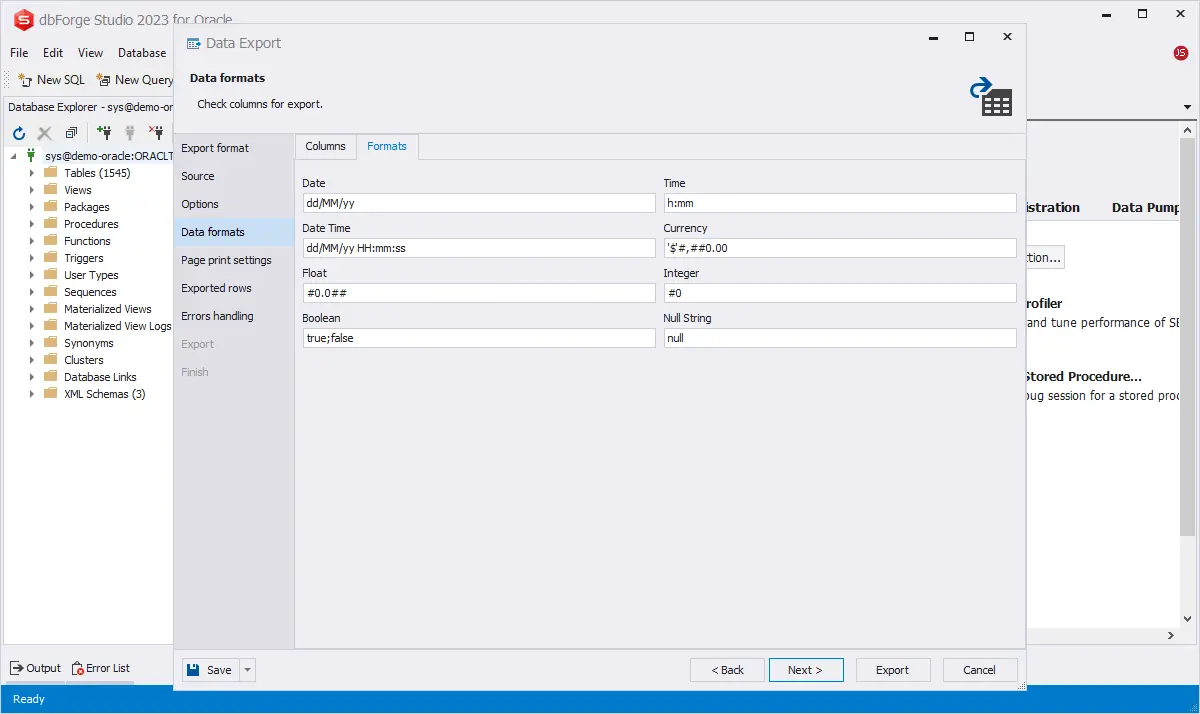
The second page is called Formats, where you can change the default format settings for Date, Time, Date Time, Currency, Float, Integer, Boolean, and Null String. Once you are ready, click Next.
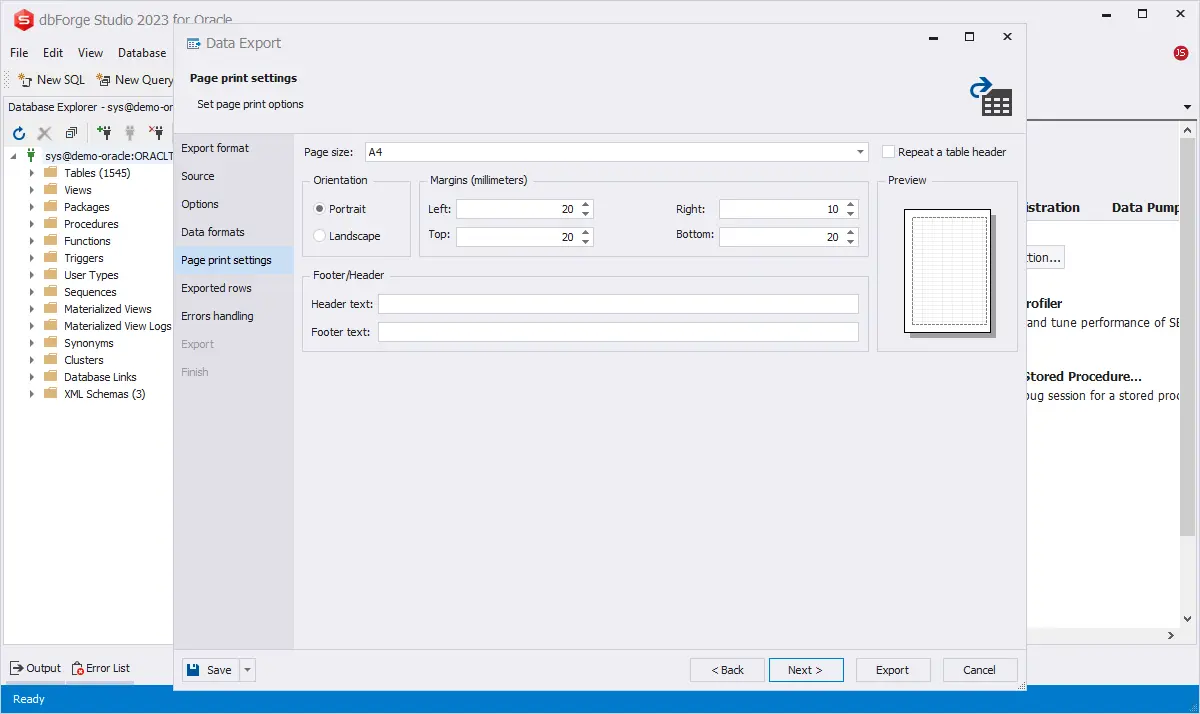
6. On the Page print settings page, configure the page size, orientation, margins, header and footer text (including the option to repeat the table header). You also get a preview of your configurations.
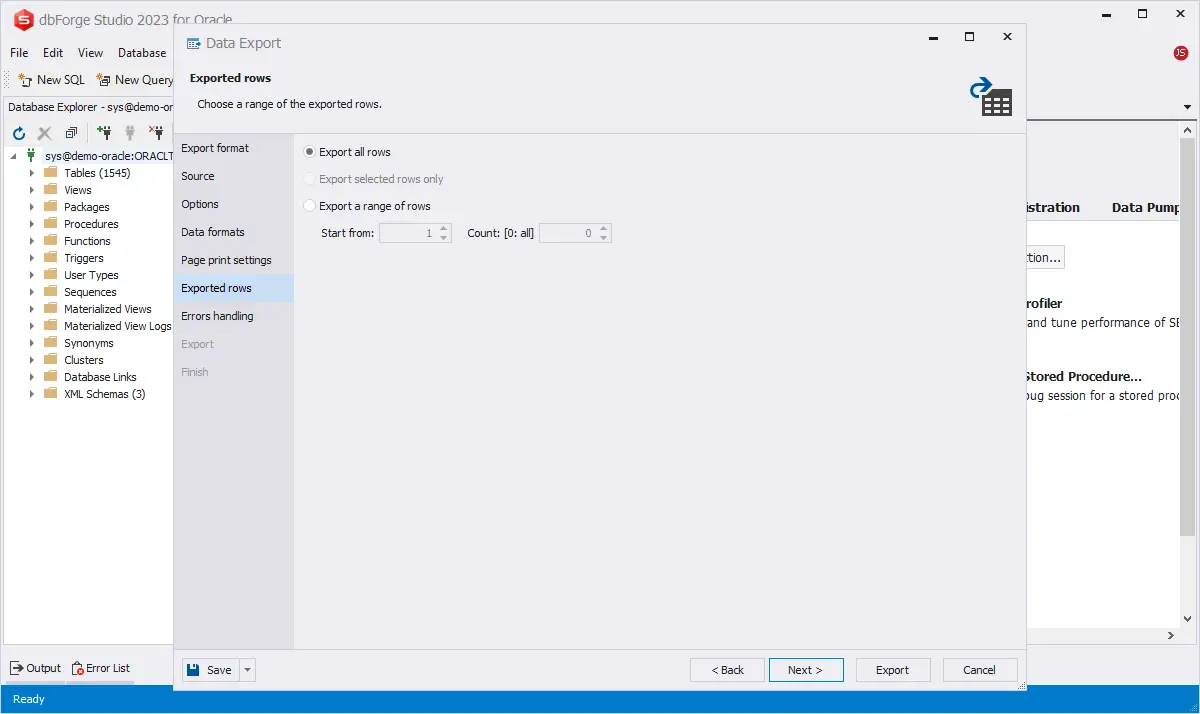
7. On the Exported rows page, select the rows to be exported. You can export all rows, export selected rows only, or export a range of rows. After you pick the preferred option, click Next.
8. On the Errors handling page, you can specify the error processing behavior and opt to write reports to a log file with a specified path. Once you do it, you can click Export to launch the operation.
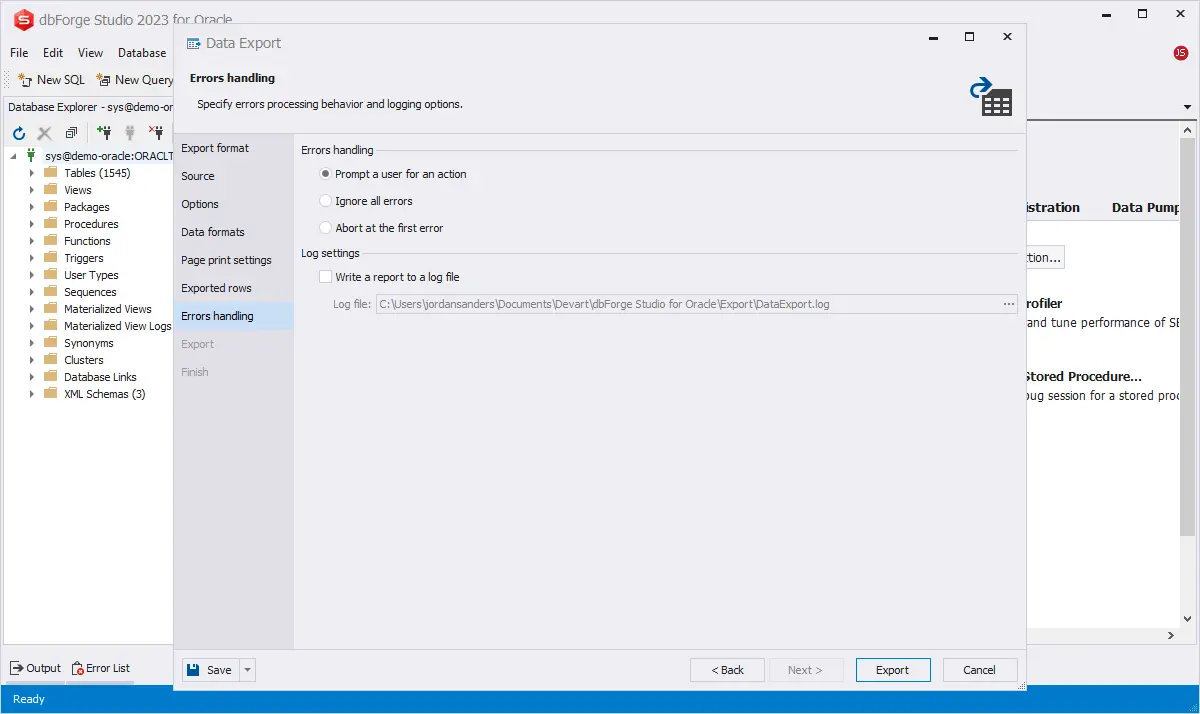
Note that if you want to save your export settings as templates for recurring scenarios, click Save Template in the lower left corner of the wizard and save a template with the settings you have just configured to a specified path. You can do it at any moment.
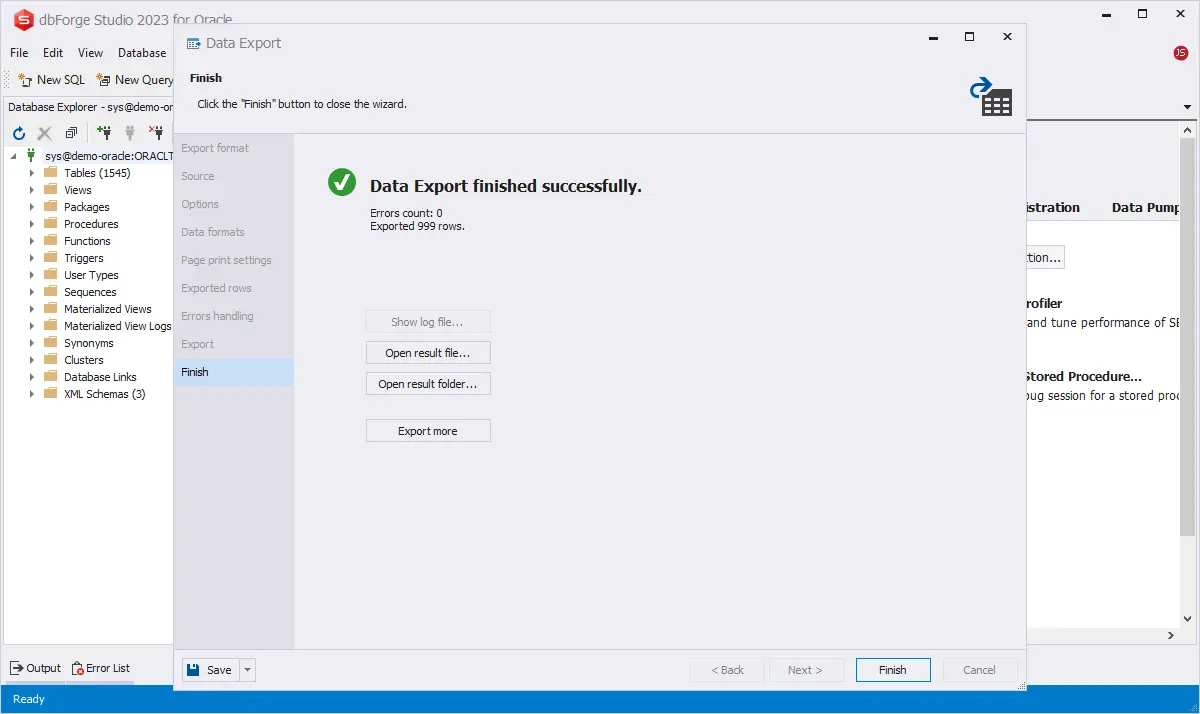
9. That's it! Your table has been exported to an XLS file. Here, you have several additional options: you can open the exported file or folder, perform another export operation, view the log file (in case you have created one), or simply click Finish.
Export Oracle data from the results grid to Excel
You can export the output of a query just as well. To do that, execute a query, right-click the results grid, and select Export Data.
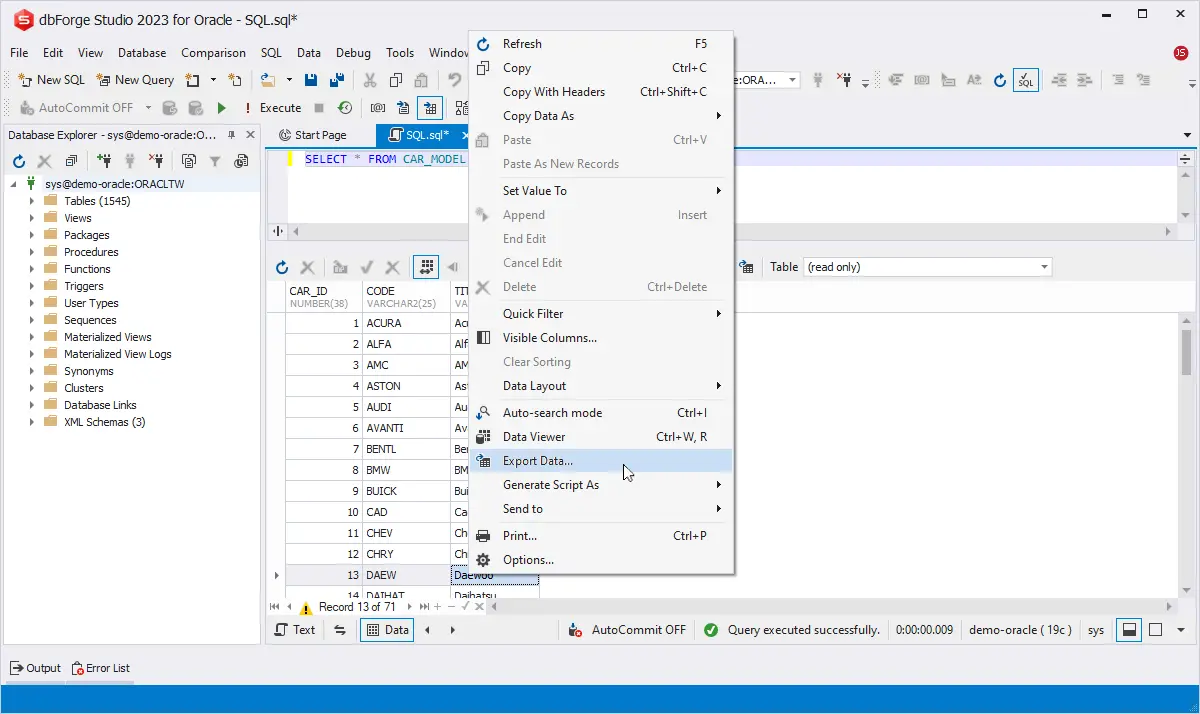
The Data Export wizard opens, and the rest of the export operation is performed in the exact same way as in the case above.
Conclusion
This was the general workflow for the powerful data migration functionality offered by dbForge Studio for Oracle. It applies well to other data formats, with minor differences in settings. Whatever operation is at hand, you only need to configure it once in a template and run it whenever you need (or even automate it from the command line, if necessary).