How to Import Data From a DBF File to SQL Server
Data migration must be fast, reliable, and easily automatable. This is specifically relevant for data import and export tasks that shouldn't take much time. If you need to perform recurring imports (e.g., regularly updating a table with data from a file), the most efficient approach is to configure your import settings once, save them as a template, and reuse or schedule them for future operations.
As a developer, analyst, or manager, you need a smart and flexible tool that supports a wide range of data formats—especially if you work with Microsoft SQL Server and prefer using SQL Server Management Studio (SSMS). In this case, dbForge Data Pump for SQL Server is your ideal solution. This powerful SSMS add-in simplifies data migration between external sources and SQL Server databases. It supports multiple data formats such as TXT, XLS, XLSX, MDB, XML, JSON, CSV, ODBC, Google Sheets, and DBF files—which we will explore next.
What is a DBF file?
A DBF file is a database file format originally created for dBASE, one of the first widely used database management systems. Introduced in the early 1980s, the DBF format became a standard for storing structured data in flat-file databases, and was later supported by the systems like Clipper, FoxPro, and their successors, such as Visual FoxPro.
Here are some of the advantages of using DBF files:
- DBF files are compatible with various database management systems.
- Thanks to their simplicity, DBF files can be easily read by older tools and software libraries.
- They can be converted into other formats such as XLS, CSV, TSV, or JSON.
While DBF files served well in earlier computing environments, modern business demands often require more robust, scalable, and integrated database systems. As a result, many organizations migrate DBF data to SQL Server to benefit from enhanced scalability, performance, data security, and regulatory compliance. However, some legacy systems still use DBF files due to their backward compatibility and long-standing stability.
Prerequisites
Before getting started, ensure the following tools are installed:
Data import from a DBF file
To get started, launch SSMS and connect to the desired SQL Server instance. Then, proceed with the following steps:
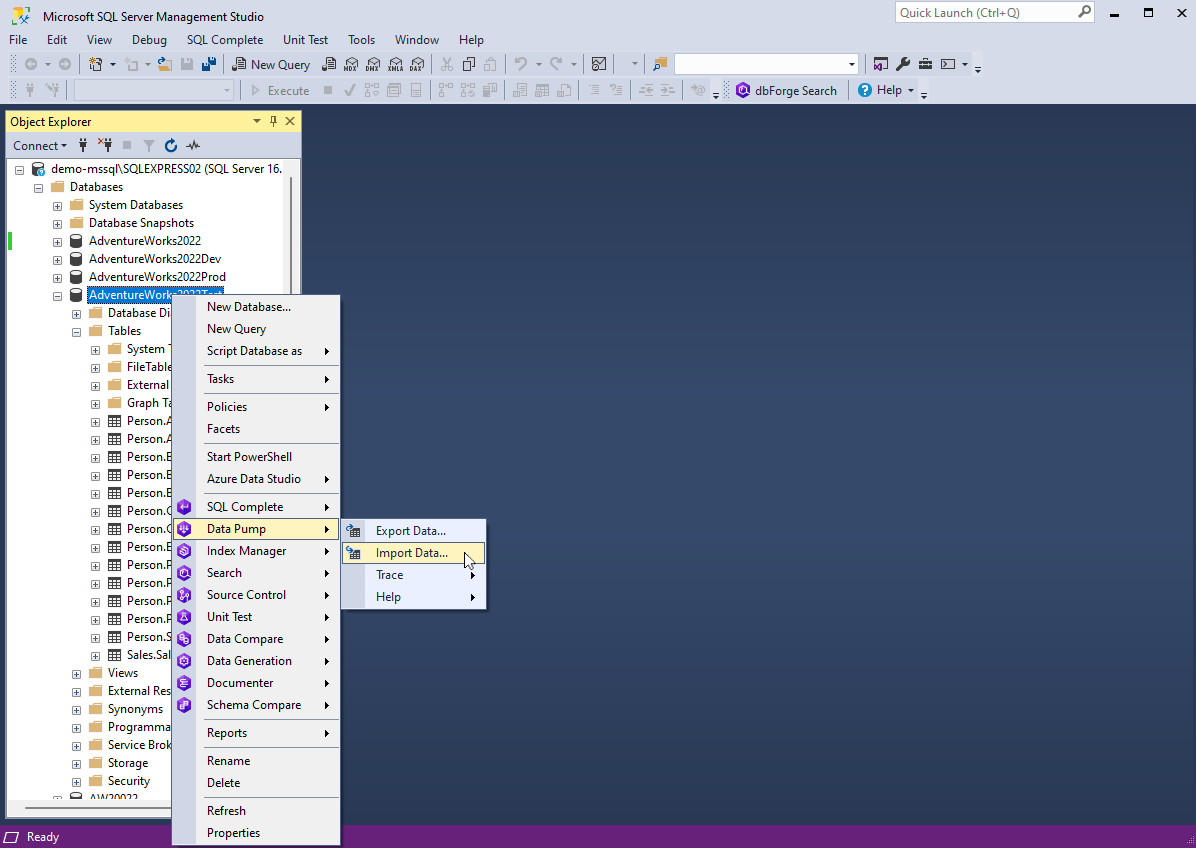
1. In Object Explorer, right-click the database where you want to import data from a DBF file, then select Data Pump > Import Data.
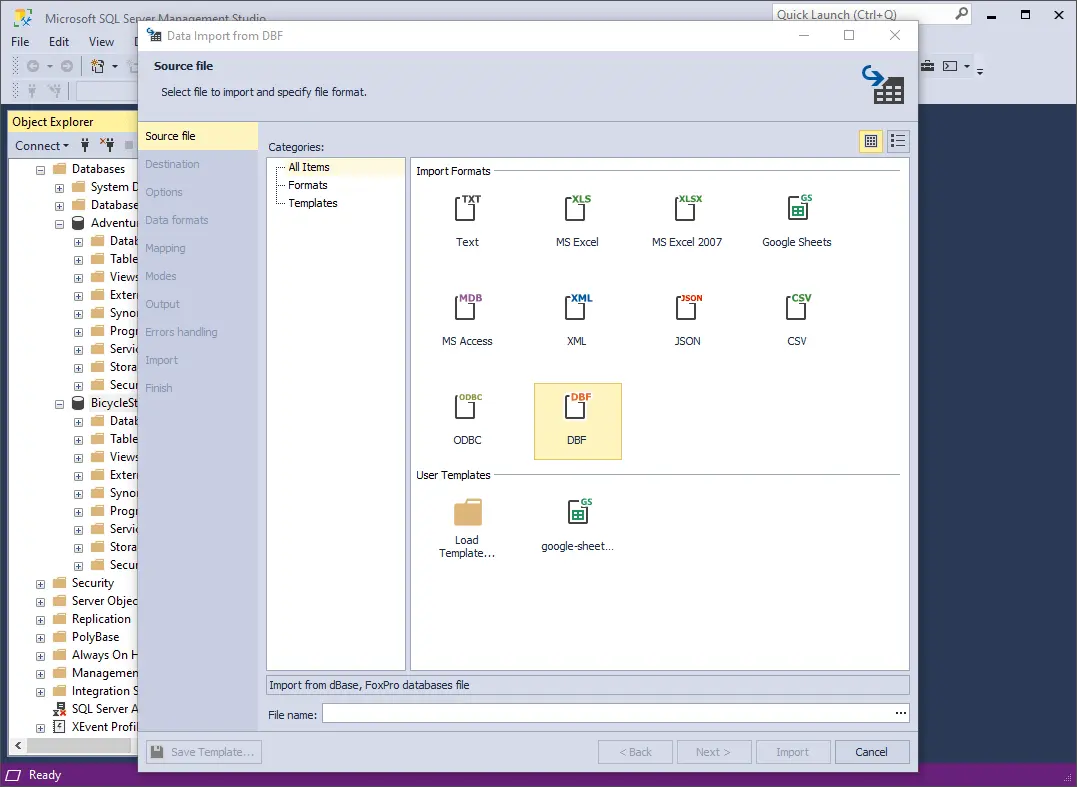
2. On the Source file page, select DBF as the file format and enter the path to the source file in the File name field. Once done, click Next.
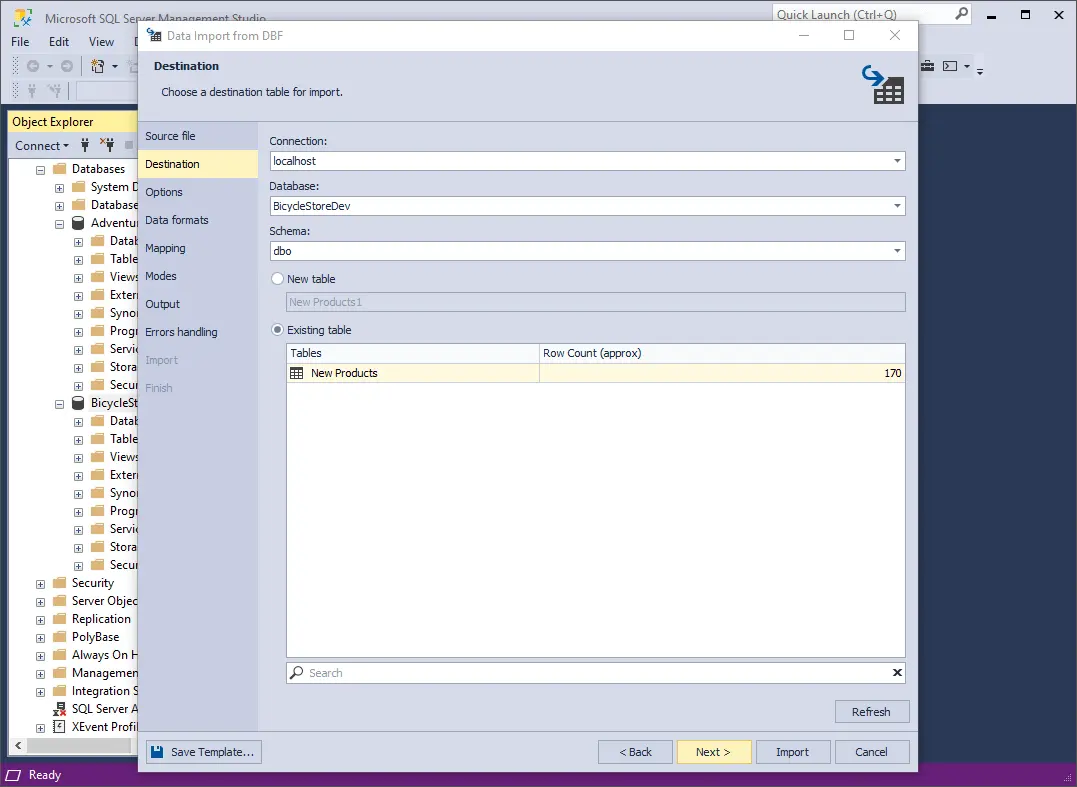
3. Select the server connection, database, and its schema. Then, choose whether to import the data into a New table (specify its name) or an Existing table. Click Next to continue.
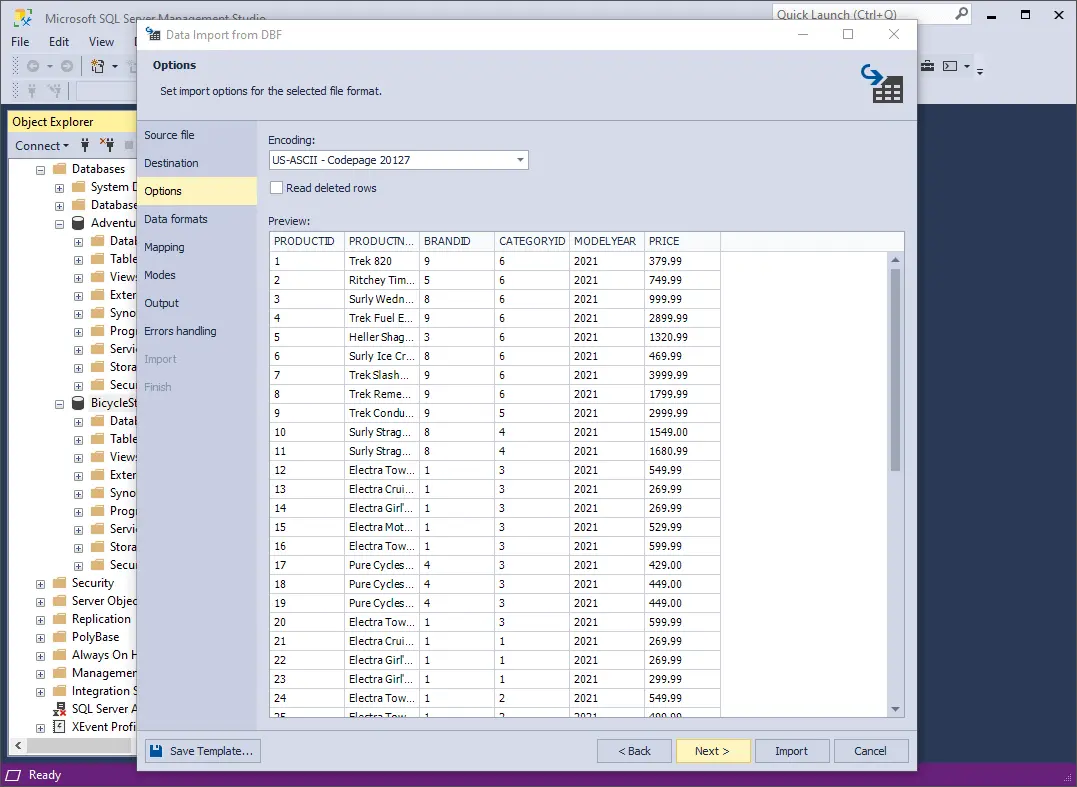
4. On the Options page, define the general options for imported data and click Next to proceed.
- First, check if the Encoding is correctly set. If not, select the appropriate encoding from the drop-down list.
- Next, select the Read deleted rows checkbox if you want to include rows marked as deleted in the source data.
- Finally, review the source data preview to ensure everything appears as expected.
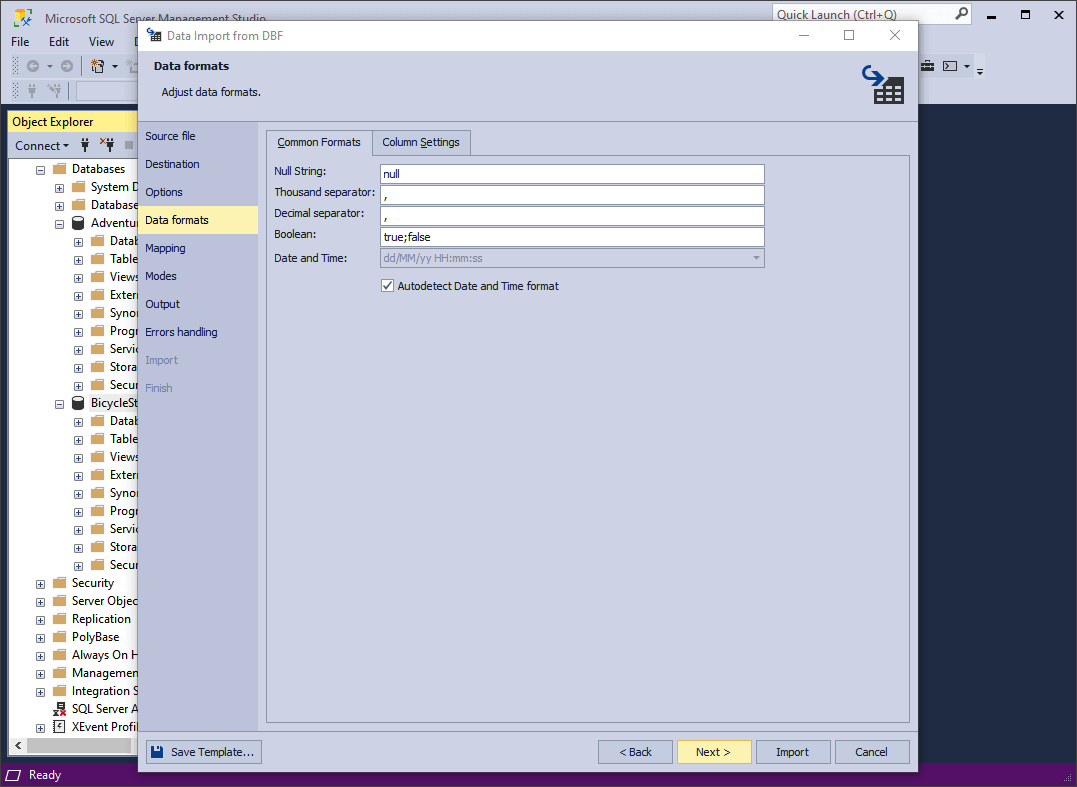
5. On the Data formats page, there are two tabs that enable you to configure formatting options of the imported data:
- Common Formats: Use this tab to define general data formatting settings, including formats for null strings, thousand and decimal separators, boolean values, and date/time formats. By default, the Autodetect Date and Time format checkbox is selected to automatically recognize date and time values.
- Column Settings: This tab allows you to fine-tune formatting for individual columns. You can configure the following options: Null String, Left Quote, Right Quote, and Date and Time. If no specific format mask is set, the application will attempt to detect date and time formats automatically.
On configuring the options, click Next to continue.
6. Now, map the source columns to the target columns. If you are importing data into a new table, the application will automatically create and map all the necessary columns. You can review the mapping results in the preview section to ensure everything aligns as expected. Then, click Next.
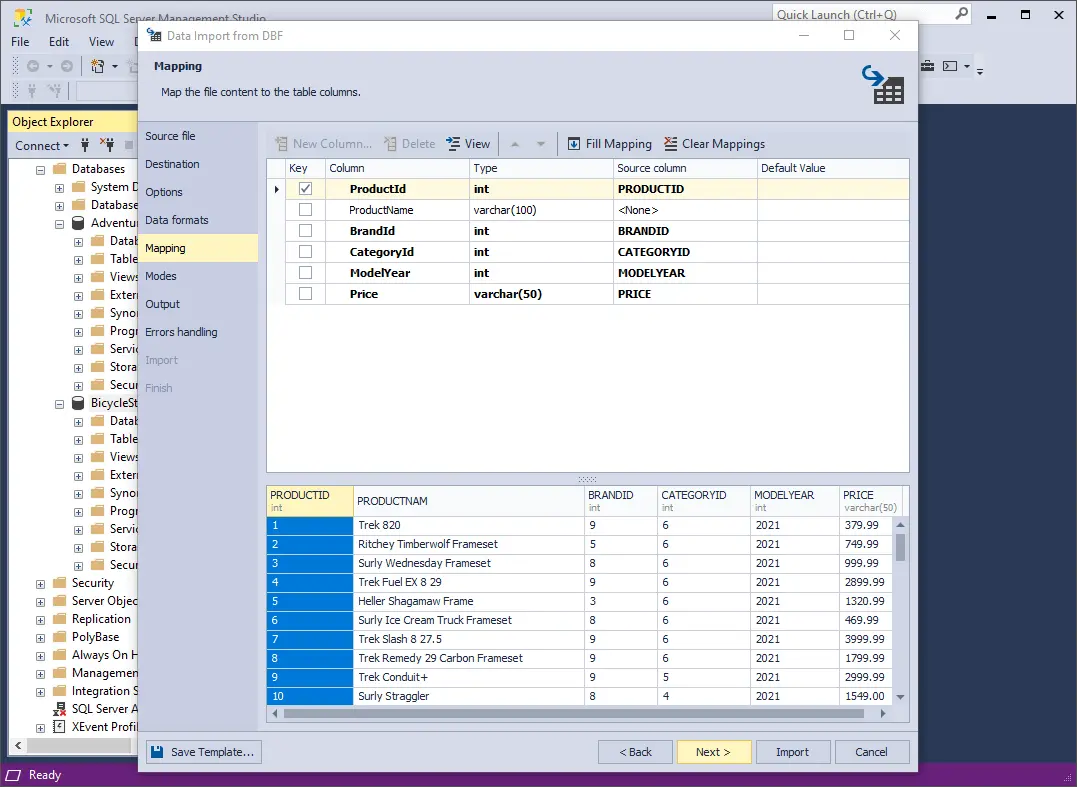
Important notes:
- If you are importing data into an existing table, only columns with matching names will be mapped automatically. Other columns must be mapped manually. If no matching names are found, columns will be mapped by position. For instance, the first column in the source will be mapped to the first column in the target.
- Ensure that at least one column is selected as a primary key by checking the corresponding Key checkbox. Otherwise, certain import modes on the Modes page will be unavailable.
You can click View on the toolbar to display column properties. To clear all column mappings, click Clear Mappings. To restore them, click Fill Mapping.
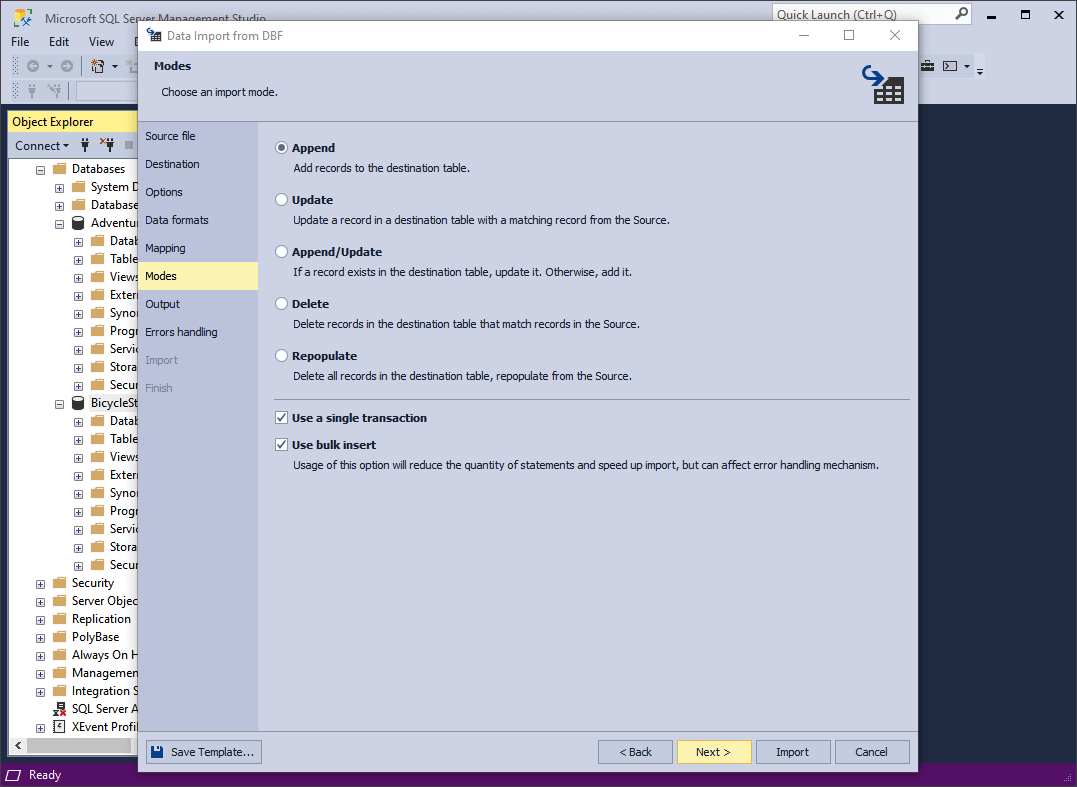
7. On the Modes page, select an import mode and click Next.
Note: If you are importing data into an existing table, all import modes will be available. However, if you're importing into a new table, only the Append mode is supported.
- Append: Adds records to the target table.
- Update: Updates existing records in the target table that match records from the source table.
- Append/Update: Updates matching records if they exist; otherwise, inserts new records.
- Delete: Removes records from the target table that match records in the source table.
- Repopulate: Clears all records from the target table and replaces them with data from the source.
Additionally, you can optionally select the Use a single transaction and Use bulk insert checkboxes, the latter of which reduces the number of statements and speeds up import but can affect the error handling mechanism.
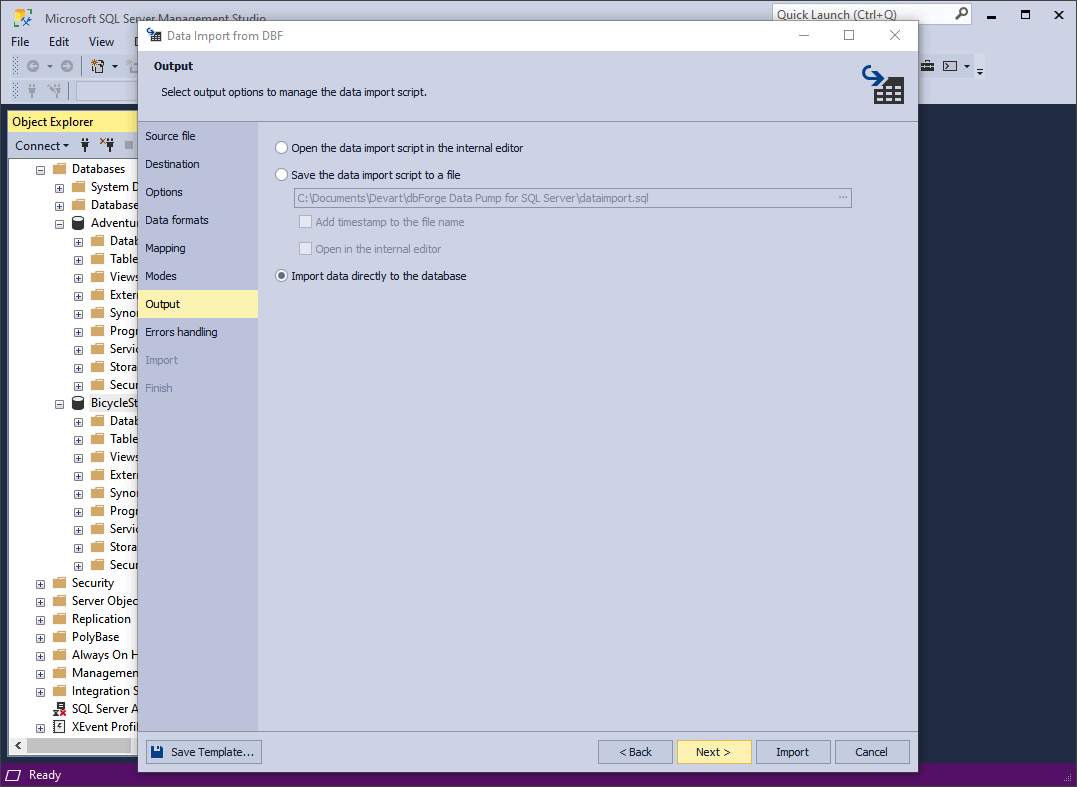
8. On the Output page, select one of the following output options:
- Open the data import script in the internal editor: View the generated data import script in the built-in editor before execution.
- Save the data import script to a file with a specified path and name. You can also select Add timestamp to the file name to avoid overwriting previous files, and Open in the internal editor if you want to review the script immediately after saving.
- Import data directly to the database: Execute the script immediately and import the data into the selected database.
Once done, click Next to proceed.
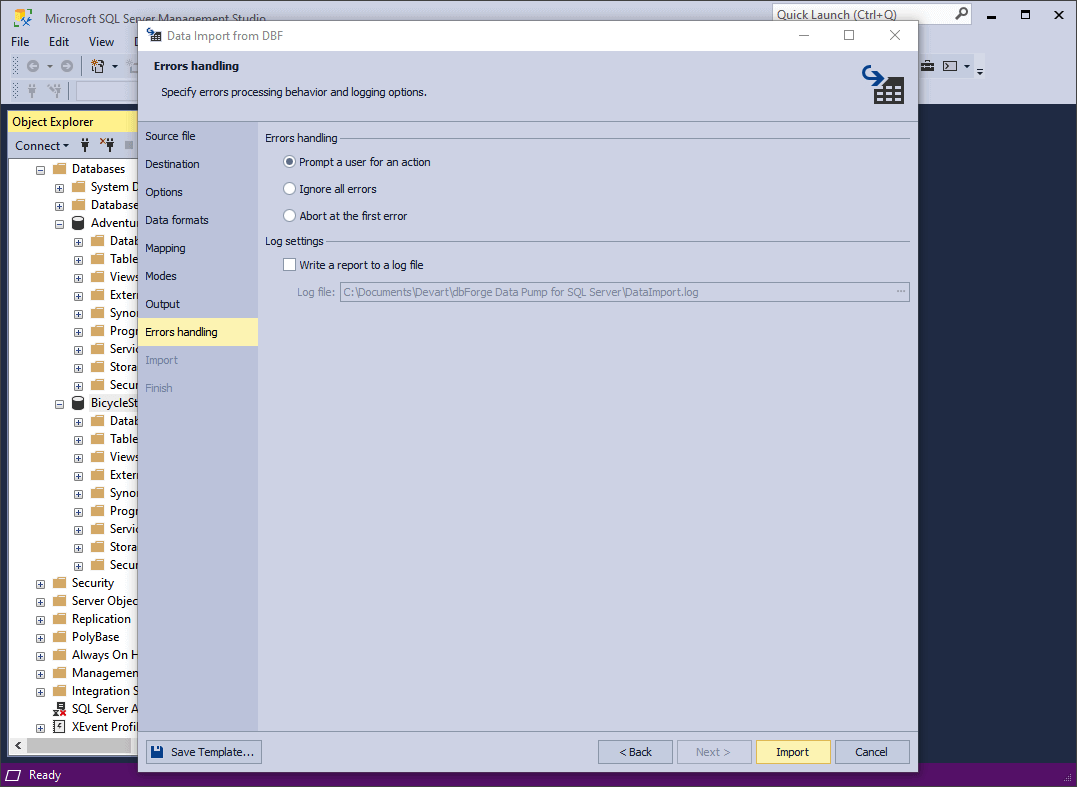
9. On the Errors handling page, you can specify the error processing behavior using one of the options:
- Prompt the user for an action
- Ignore all errors
- Abort at the first error
Additionally, you can specify a path for saving reports to a log file.
When everything is configured, click Import to begin the import process.
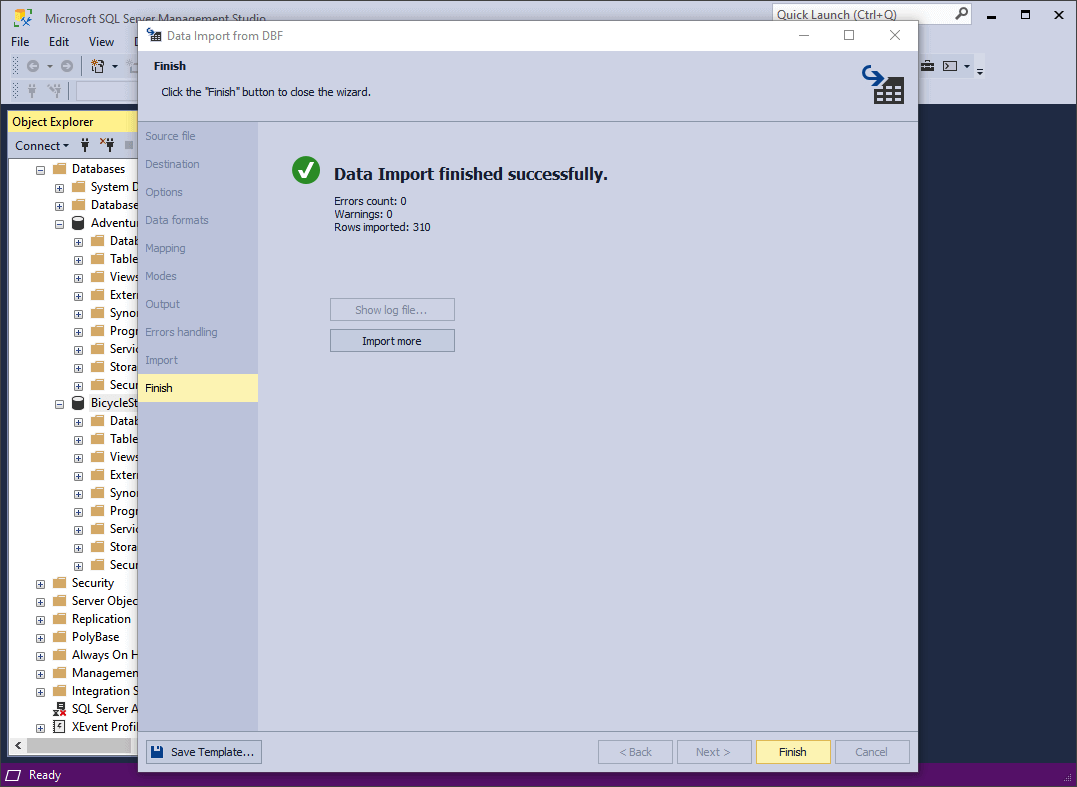
10. Once the import process is completed, you can either click Import more to start a new import or click Finish to exit the wizard.
Useful tips
In order to make the most of your import, we'd like to suggest the following tips:
- Before importing a DBF file, make sure it does not contain inconsistencies or errors.
- If your target table has indexes, you may consider removing them before the import and recreating them afterwards. This will speed up the import process.
- Use appropriate transaction management settings. In some cases, removing or reducing transaction logging during the import may improve its overall speed.
- If you have to deal with large datasets, consider using bulk loading techniques such as BULK INSERT or BCP (Bulk Copy Program) utility for faster data transfer.
-
If you want to save your import settings as templates for recurring use, click Save Template in the upper left corner of the wizard. You can do it at any moment when configuring your settings.
Conclusion
We hope that our tutorial will be useful for your future endeavors. The overall flow is generally applicable for all 10 data formats available for import in dbForge Data Pump for SQL Server; however, the number of pages and options may vary for different formats.
Still, it's as flexible as import and export can get, and thus we gladly invite you to download Data Pump for a free 30-day trial.
Note that dbForge Data Pump for SQL Server is included in the dbForge SQL Tools bundle, which features 15 standalone applications and SSMS add-ins. This comprehensive toolkit is designed to enhance SQL Server development, management, and administration.
FAQ
DBF files are typically used to store tabular data, such as customer records, product information, or financial data. Each DBF file contains a header record, which describes the structure of the file, and then a series of data records, which contain the actual data. The straightforward design and efficiency of DBF files make them a popular choice across various industries, including business, government, and education.
How do I get data from a DBF file?
To extract data from a .dbf (dBASE/FoxPro) file, you can utilize various programming languages and tools. One highly recommended tool for this purpose is dbForge Data Pump for SQL Server, which offers a user-friendly interface and robust features for importing and exporting data between .dbf files and SQL Server databases.
What defines DBF files as legacy database formats?
DBF files (short for Database Files) are considered legacy files since they originate from early database systems, offer limited functionality, and are not well-suited for modern applications. They are typically associated with outdated technologies and are gradually phased out in favor of more robust and scalable database solutions
How to convert DBF to other formats?
To convert DBF files to other formats like XLS, CSV, TSV, or JSON, you can use various tools and methods depending on your preferences and platform. We would like to recommend using dbForge Data Pump for SQL Server, our lightweight SSMS add-in that supports a wide range of export formats.
Follow these simple steps:
1. Import the DBF data into your selected database.
2. Use the Export Data option to export the data to the formats such as CSV, XLS / XLSX, JSON, TSV, and others.
3. Follow the steps in the Export Wizard and select the output format and destination.
