MySQL Select Database
Chances are that you have multiple databases on the MySQL Server instance you're connected to; and when you need to manage several databases at once, you need to make sure you have selected the correct database. The following guide will tell you all about selecting MySQL databases to work with. Generally, there are two main ways to get it done. The first one is to use the MySQL Command Line Client; the second one is to try a convenient GUI tool. We'll take a look at both.
How to select a database in MySQL
So, before selecting a database, you need to connect to a MySQL instance. In the MySQL Command Line Client, you can do it with the following syntax:
mysql -u {username} -p'{password}' -h {hostname} -P {port}
In this syntax:
- -u is the user name
- -p is the password; make sure there are no spaces in this construct
- -h is the host name or IP
- -P is the port of your remote server
The actual example may look as follows:
mysql -u root -p'pass' -h 127.0.0.1 -P 3306
If you are already logged in to your server, all you need is the username and the password:
mysql -u {username} -p'{password}'
mysql -u {username} -p, the Command Line Client will prompt you for the password.
Type it and hit Enter to apply it.
In this case, we haven't specified a database that we want to work with, which means MySQL will set our current database to NULL. We can check the list of our databases with the SHOW DATABASES statement or simply select the required database in the following way:
USE {database};
What is the MySQL SELECT DATABASE statement?
If we select a database with the USE statement, then what is SELECT DATABASE for? Well, the answer is rather simple; we run it to check our current database. For instance, if you specify sakila as your current database and run the following query:
SELECT DATABASE();
The output will look as follows:
+------------+
| DATABASE() |
+------------+
| sakila     |
+------------+
1 row in set (0.03 sec)
Selecting a MySQL database on login
You can select the required database when logging in to your MySQL server. To do that, simply add -D {database} to the command we have shown previously.
This is what it will look like:
mysql -u {username} -p'{password}' -h {hostname} -P {port} -D {database}
Here, we'd like to reiterate that all database names are case-sensitive.
Using dbForge Studio for MySQL to select a database
If you prefer a convenient GUI over the command line, there is no better way to select and manage databases than using dbForge Studio for MySQL, one of the best available IDEs for MySQL and MariaDB databases.
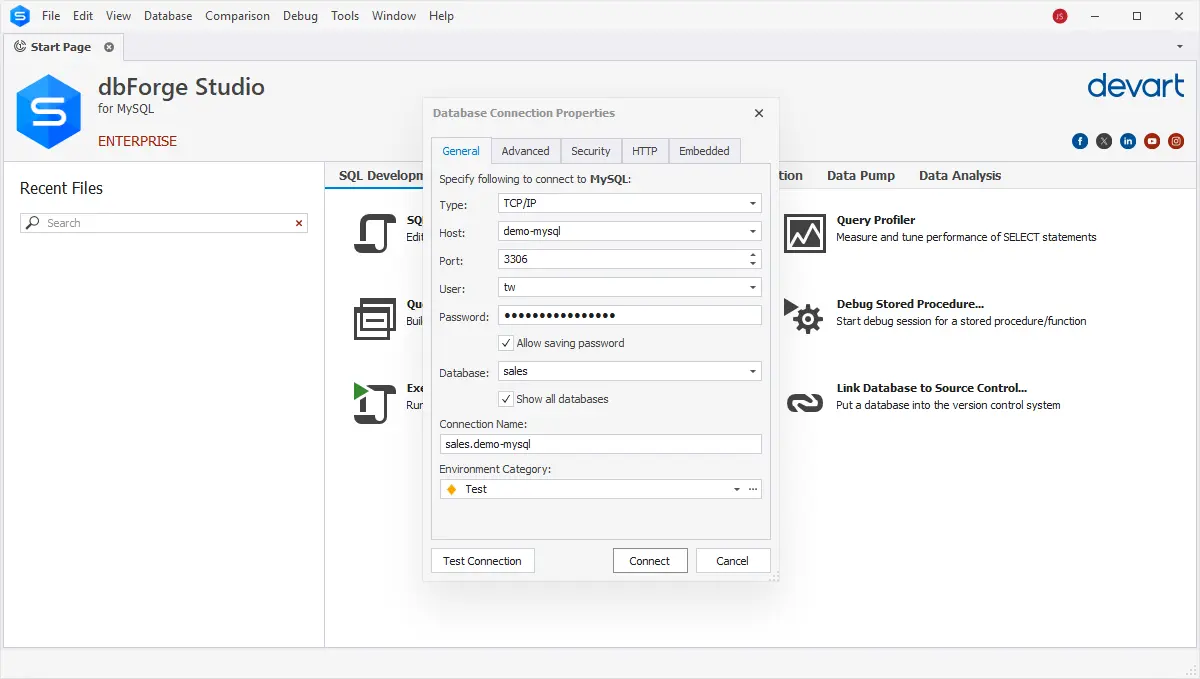
When you open the Studio for the first time, you will be greeted by the Database Connection Properties window, where you will be able to specify all the parameters required for connection: Type, Host, Port, User, and Password. And just below those fields, you will find the Database drop-down, where you can simply select the required database from the list (in our case, it will be the sakila sample database). Optionally, you can click Test Connection to verify your credentials. Then simply hit Connect, and there you have it.

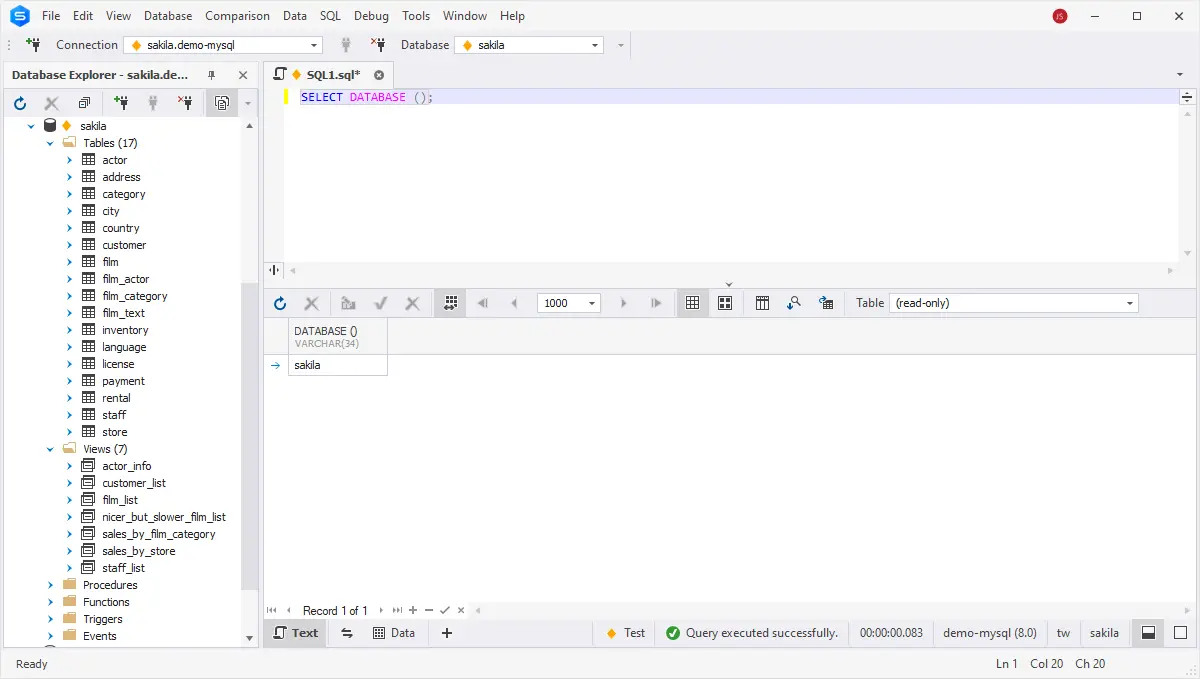
Now that you are connected, you can see the available databases in the Studio's Database Explorer, accessed from the View menu > Database Explorer.
In our case, we see that sakila with all of its data is firmly in place. It is also indicated in the Connection and Database fields. We might as well double-check that it is set as our current database by running SELECT DATABASE. And indeed, we get sakila in the output.

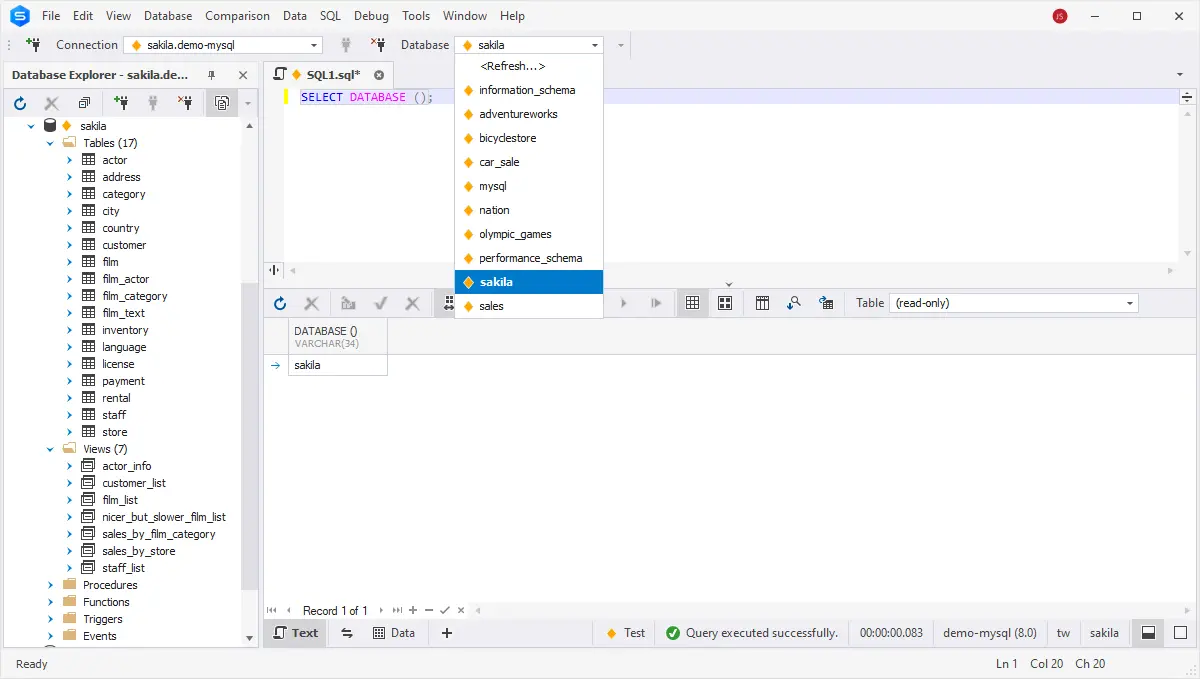
If you want to select another database in the Studio, simply select the one you want from the Database drop-down menu.

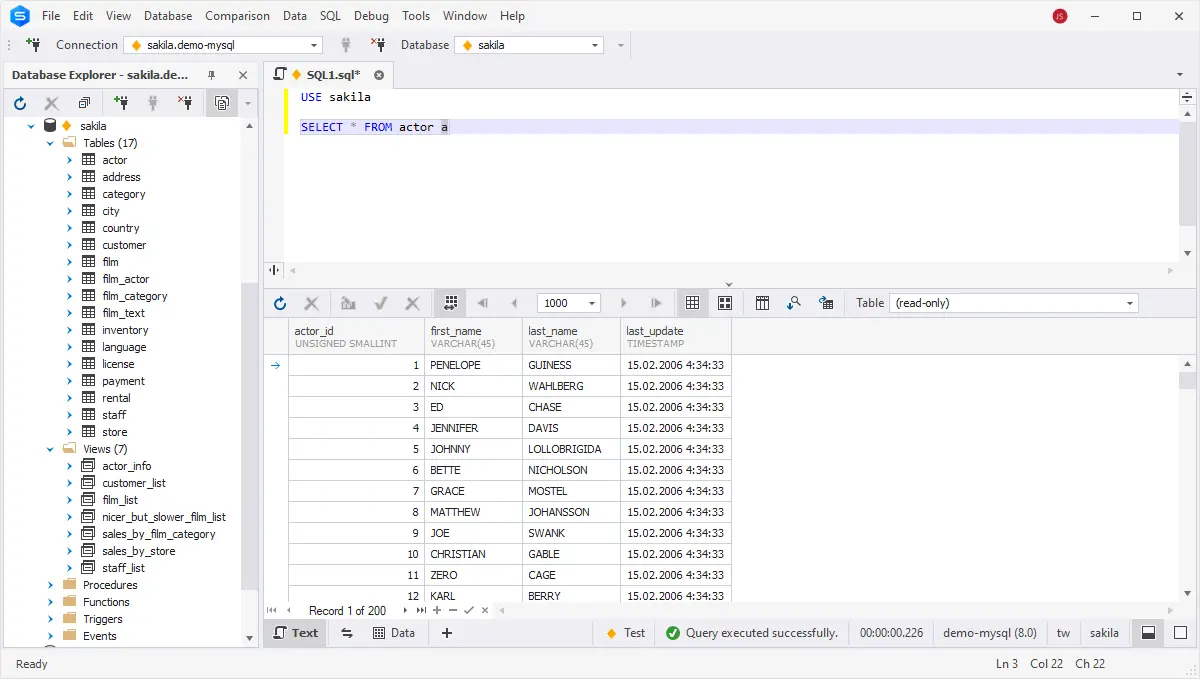
Finally, to select a specific database, you can apply the USE statement directly in your query. In our case, we'll simply retrieve all data from the actor table.

That's it! As you can see, dbForge Studio makes it easier than ever.
The one last thing we'd like to add is that the Studio offers quite a few capabilities beyond writing and executing queries:
- Context-aware code completion, formatting, refactoring, and debugging
- Comparison and synchronization of MySQL schemas and table data
- Visual database design and query building
- Query optimization
- Data import and export supporting 14 most popular data formats
- Generation of column-intelligent data for testing
- Management of users and privileges
- Database migration, backup and recovery
- Aggregation of data in pivot tables
- Generation of full database documentation and compelling data reports
- ...and much more!
Conclusion
Now you know how to select databases in MySQL, and you can try the best IDE on the market that will help you handle them with ease. That said, download dbForge Studio for MySQL for a free 30-day trial and see how effectively it can streamline your daily work with databases.