
How to export SQL Server data to HTML
Exporting data from an SQL Server database to HTML is a widespread practice. HTML, being the standard language for creating web pages, makes this format suitable for web-based data display, creating formatted reports, and sharing via email. To streamline and ensure the accuracy of this process, the dbForge Data Pump utility serves as an excellent tool.
Advantages of using Data Pump
Data Pump is an add-in for SQL Server Management Studio (SSMS) that specializes in data migration tasks. It performs the transfer of data between systems, populates databases with external data, and exports data to various formats, including HTML. It supports numerous popular data formats and offers a wide array of options to enhance task execution and results.
Here are some of the advantages of using Data Pump for data export:
- Selecting specific data to export (databases, tables, views)
- Exporting tables, or specific rows, or the range of rows
- Exporting to a single file or several separate files
- Convenient data export wizard for simple task configuration
- Various customization options
- Templates for data export tasks
- Automating data export tasks via command line or PowerShell
- Possible integration with the DevOps Automation module
How to export data to HTML
1. In Object Explorer, right-click a database, point to Data Pump, and click Export Data.
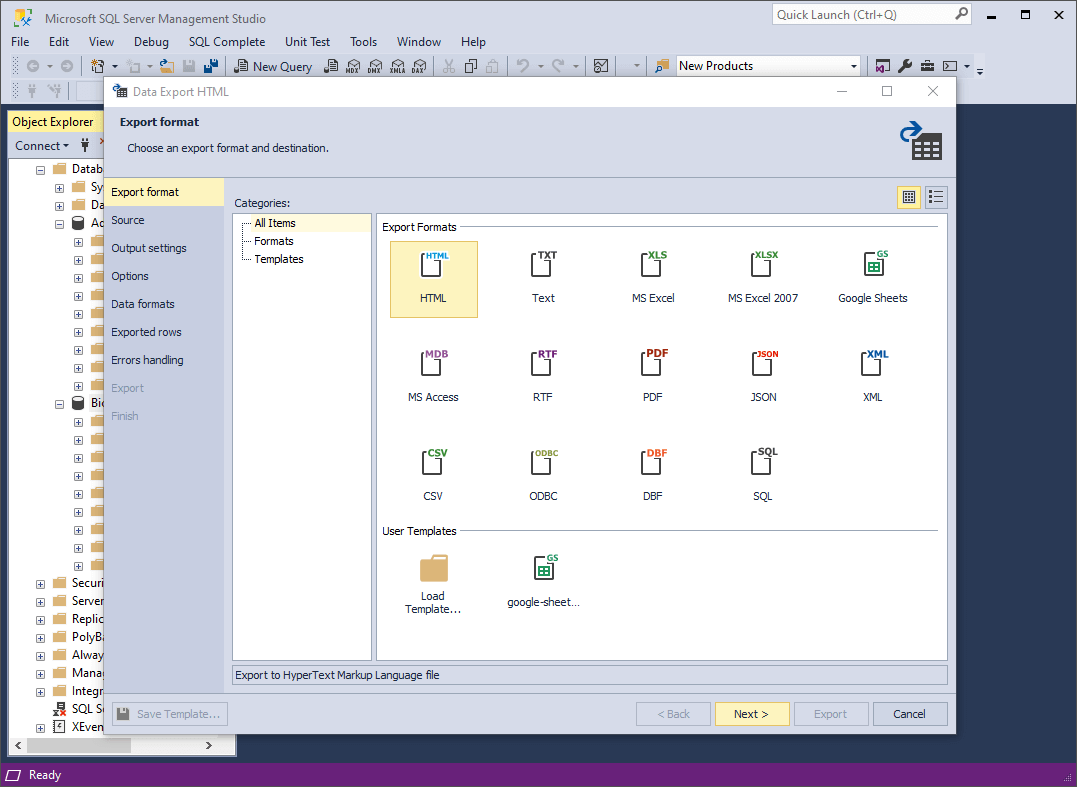
2. On the Export format page, select the HTML export format or load export options from the template file if you saved it previously. Click Next.
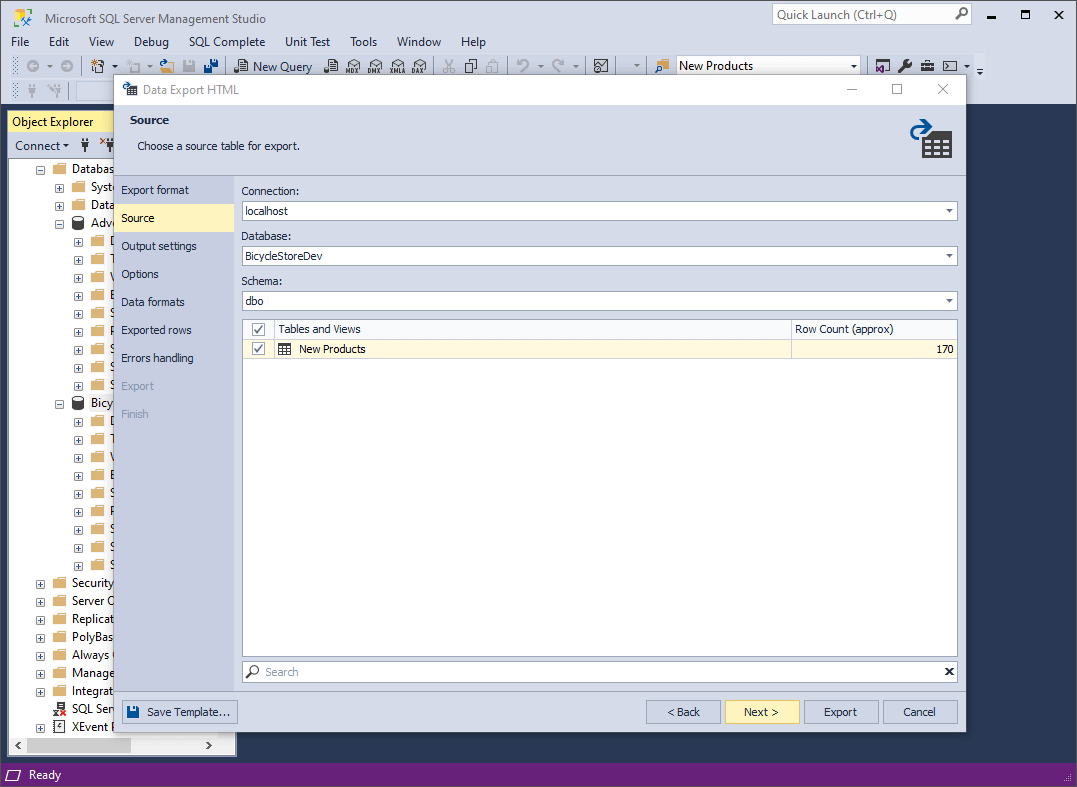
3. On the Source page, select the necessary server connection, the database and its schema, table(s), and view(s) that you want to export, and click Next.
4. On the Output settings page, you have two main options:
- Export data into separate files, where you specify the path to the folder that they will be saved to.
- Export data into a single file, where you specify the path and the file name.
You will find the list of files to be exported in the Exported files preview box.
You can also enable additional options:
- Append timestamp to the file name
- Auto delete old files to delete automativally those exported files that are older than the number of days specified.
- Use compression (Zip) to create an archive file with your exported files. Additionally, you can specify the compression level (No Compression, Best Speed, Fast, Default, Good, or Maximum), add comments, encrypt your archive with AES128 or AES256 encryption, and specify the decryption password.
If the destination folder does not exist, the application will prompt you to create it. Click Yes to proceed.

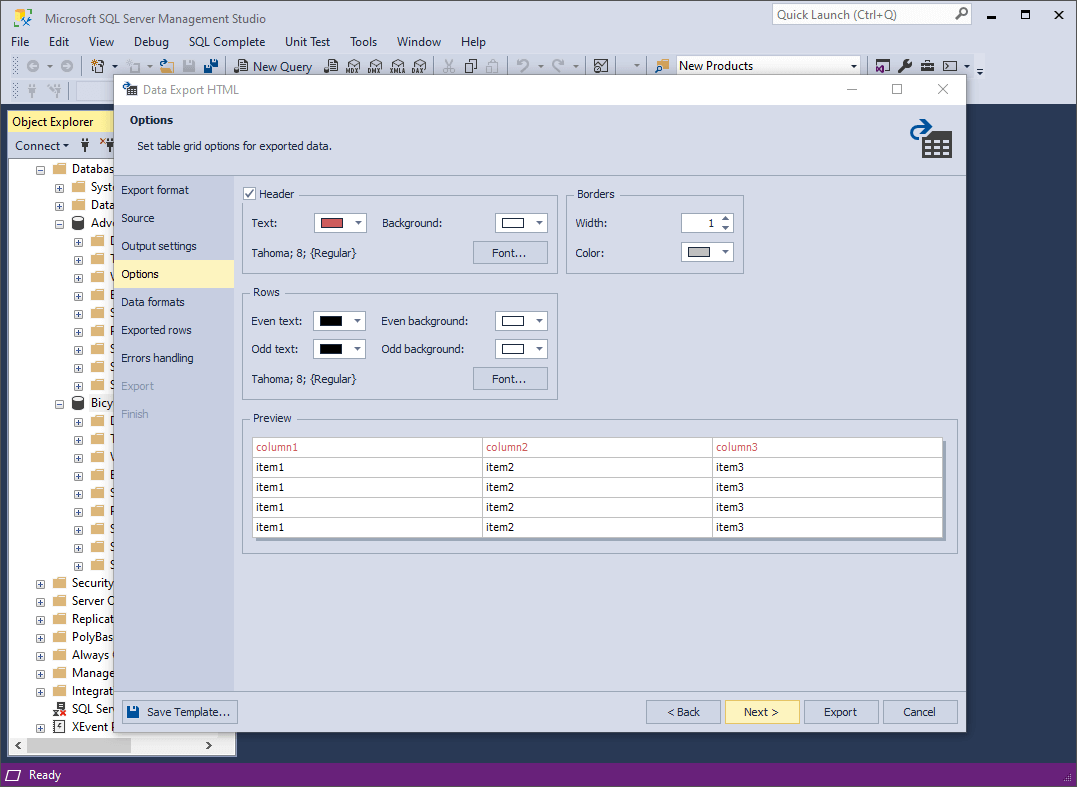
5. On the Options page, you can set the table grid options for exported data: text and background colors and fonts in Header and Rows, as well as width and color of Borders. The results of your configuration are shown in the Preview box.
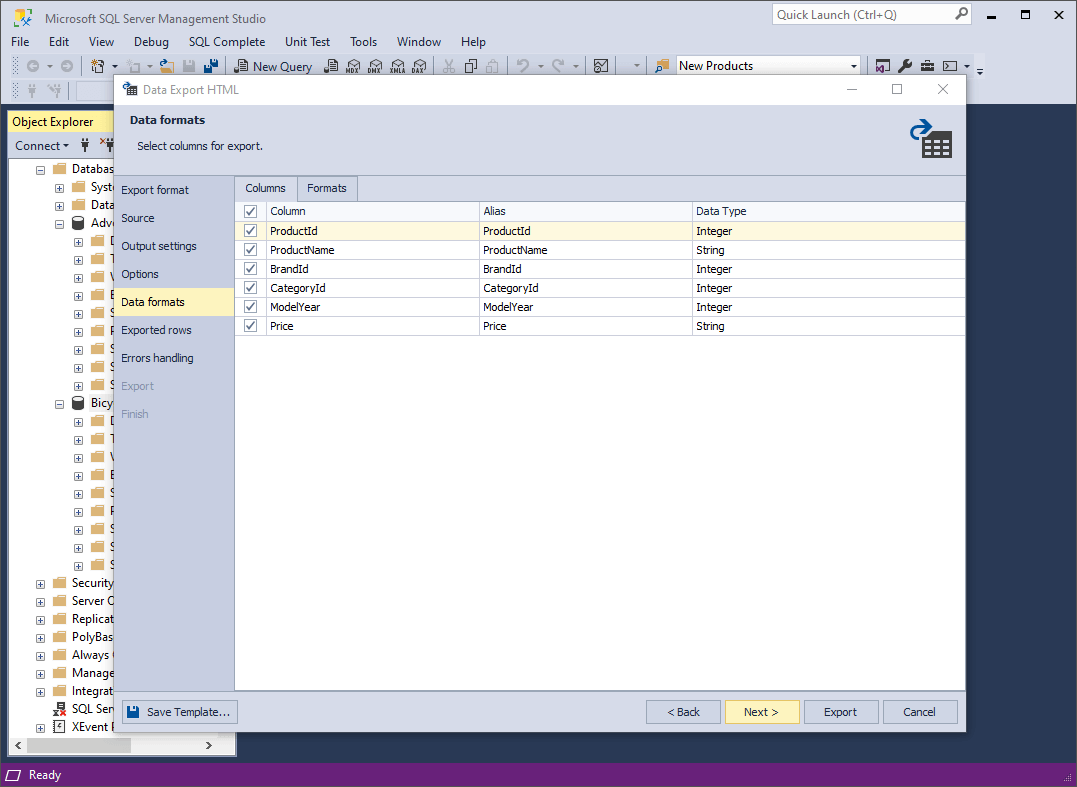
6. On the Data formats page, you have two auxiliary tabs. The first one is Columns, where you can select columns for export and check their aliases and data types.
The second one is Formats, where you can change the default format settings for Date, Time, Date Time, Currency, Float, Integer, Boolean, and Null String, as well as select the required binary encoding from the drop-down list.
7. On the Exported rows page, you can select to export all rows, export the rows selected on the Data formats page, or export a specified range of rows.
8. On the Errors handling page, you can specify the error processing behavior (using one of the three available options: Prompt the user for action, Ignore all errors, or Abort at the first error) and opt to write reports to a log file with a specified path.
Note: If you want to save your export settings as templates for recurring scenarios, click Save Template.
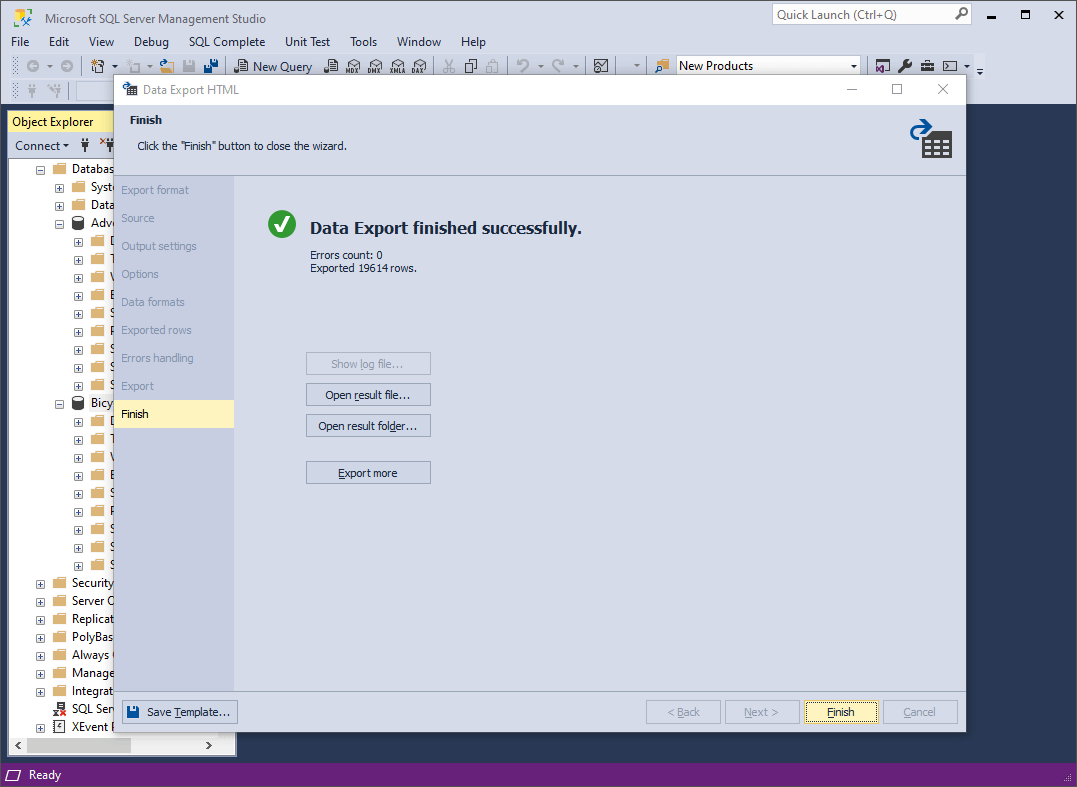
9. Click Export. When the data export task is completed, you have several options: open the exported file or folder, perform another export operation, view the log file, or simply click Finish.
Conclusion
This tutorial offers a step-by-step guide on transferring the data from an SQL Server database to an HTML file (or several separate files) with the help of the Data Pump utility and its in-built Data Export wizard that streamlines the process and saves your time.
dbForge Data Pump is a tool tailored for efficient data migration, both data import into databases from external sources and data export to various formats, including HTML. It significantly boosts user performance and helps achieve maximum efficiency in work.